How to Transfer iPad to iPad in 2026: 6 Safe Methods

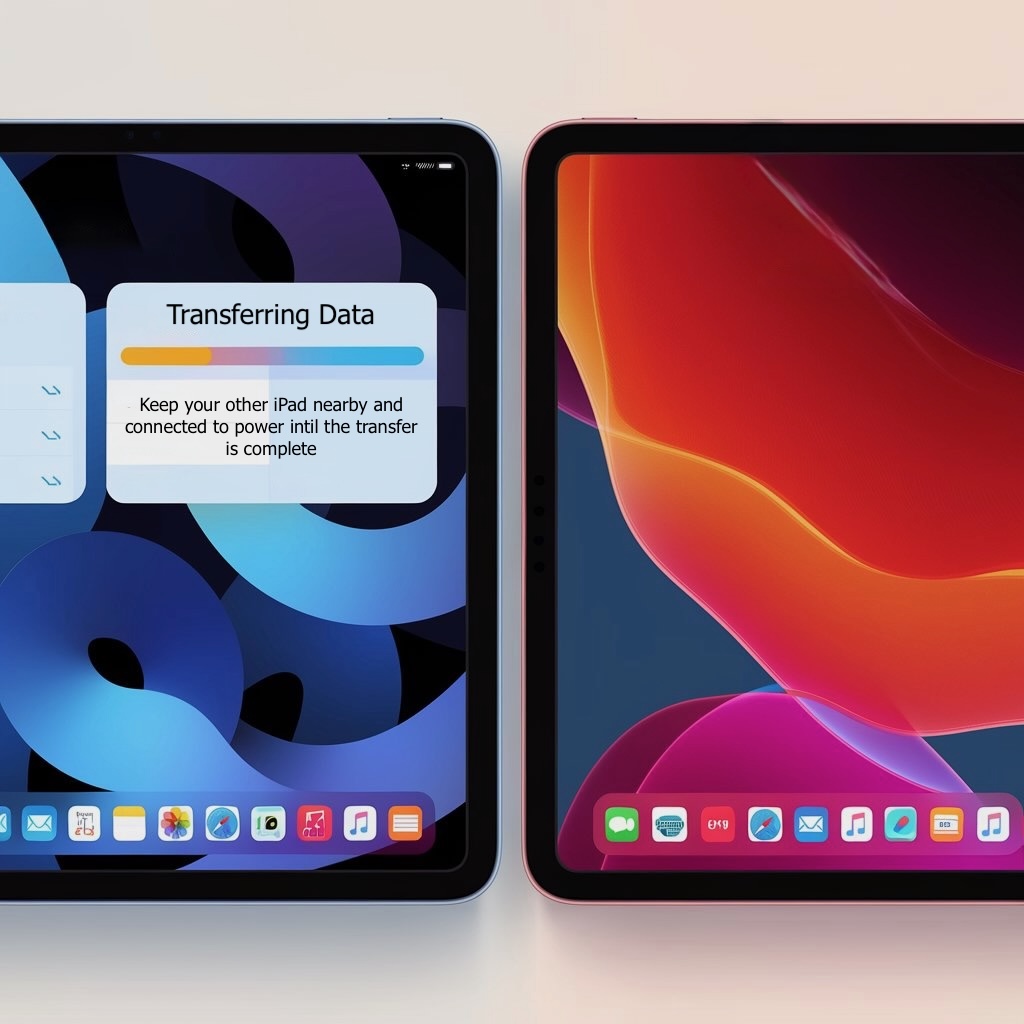
To transfer iPad to iPad, use Quick Start when the new iPad is new or erased. Use AirDrop or Files for a few items after setup. On Windows, use a local AltTunes backup or export when you want a safety copy before migration, but keep Apple's setup tools as the full-device transfer path.
This guide explains how to transfer iPad to iPad with Quick Start, iCloud, a supported cable setup, Finder, Apple Devices, iTunes, AirDrop, Files, and AltTunes. It also shows what to do when the new iPad is already set up.
Quick Answer: Which iPad Transfer Method Should You Use?
Best default: use Quick Start for a full move to a new or erased iPad. If you need to transfer data from iPad to iPad after setup, choose a selected-file method unless you are prepared to back up and erase the destination.
Quick Takeaways for a Safe iPad Transfer
Use this table to choose the least destructive path before you touch either device.
Method | Full migration or selected data | Destination state | Cloud required | Main limit |
|---|---|---|---|---|
Quick Start | Full migration | New or erased | No for direct transfer | Direct transfer keeps both iPads busy |
iCloud Backup | Full restore | New or erased | Yes | Needs Wi-Fi and enough iCloud storage |
Supported wired setup | Full migration when offered | New or erased | No | Support depends on both iPads, ports, and cable setup |
Finder / Apple Devices / iTunes | Full local backup restore | New or erased | No | Restore can replace data already on the new iPad |
AirDrop / Files | Selected photos, PDFs, links, or documents | Works after setup | No for AirDrop | Does not move apps, settings, or the full device state |
AltTunes | Selected Windows backup, browsing, export, clone, and supported restore | Export works without erasing | No | Windows only; not a full Quick Start replacement |
Quick Start is the best method for most new iPads. It moves much of the old device state during setup. After setup, a full Apple restore usually means erasing the new iPad first, while selected-file methods leave its current data in place.
Before we begin
Windows users who want a local safety copy should download AltTunes for Windows, connect the old iPad, and save a backup or selected categories to the PC or an external drive. Quick Start remains Apple's best full setup migration. AltTunes does not merge a complete old iPad state into an already configured iPad.
Keep both iPads powered. Keep the old iPad until you have checked the result on the new one. Apple's transfer-method guide helps you choose Quick Start, iCloud, or a computer backup before setup.
Update both iPads to the latest iPadOS version they support.
Charge both iPads or keep them plugged in.
Turn on Wi-Fi and Bluetooth on the old iPad.
Keep your Apple Account password ready.
Check storage on the new iPad. A 64 GB iPad will not swallow a 256 GB backup.
If you use iCloud Backup, check whether you have enough iCloud storage.
If you use a computer backup, choose encrypted backup if you need sensitive data included.
If your iPad has cellular, move the SIM or eSIM as Apple recommends.
Keep both devices near each other until migration finishes.
Method 1: How to Transfer iPad to iPad with Quick Start
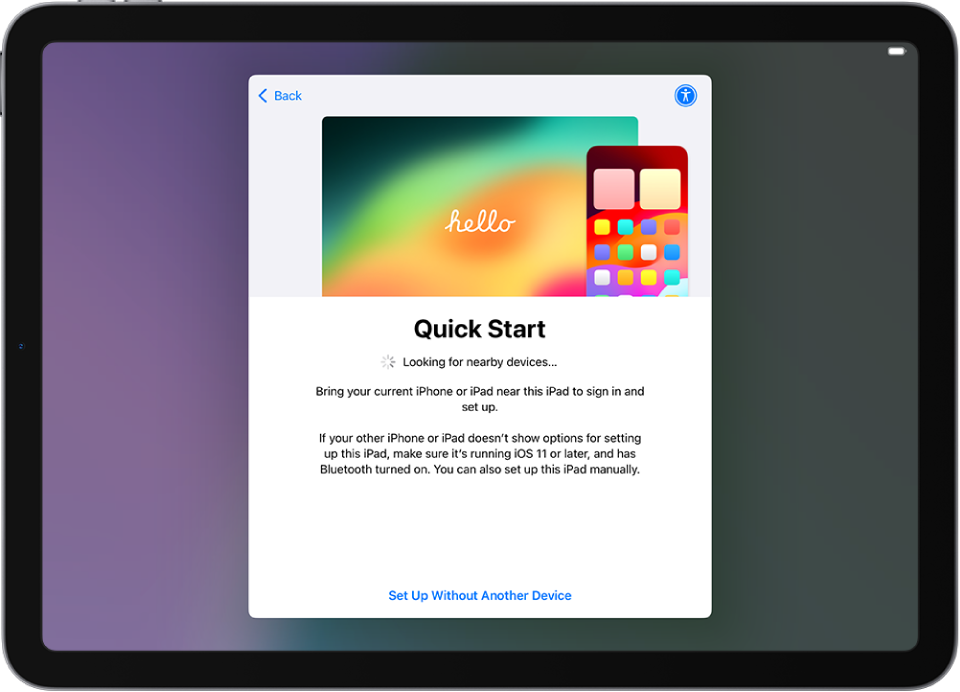
Quick Start is the easiest way to transfer iPad to iPad when the new iPad is new or erased. Apple designed it for full-device migration during setup, not for merging 2 iPads that already contain different data.
Use Quick Start if you want your new iPad to feel like your old iPad: apps, settings, photos, messages, and account setup all moved together.
How to use Quick Start on iPad
- Turn on Wi-Fi and Bluetooth on your old iPad.
- Place the old iPad next to the new iPad.
- Turn on the new iPad and wait for the setup screen.
- When Quick Start appears on the old iPad, tap Continue.
- Scan the animation on the new iPad with the old iPad.
- Enter the old iPad passcode on the new iPad.
- Choose how to transfer your data.
- Keep both iPads nearby and plugged in until the transfer finishes.
Apple gives you 2 paths inside Quick Start. An iCloud download lets you start using the new iPad while apps and content continue downloading. A direct transfer keeps both iPads occupied until migration finishes. Apple's Quick Start guide documents the current setup flow.
When Quick Start is the best choice
Quick Start works best when:
- The new iPad is at the Hello setup screen.
- Both iPads are nearby.
- You have strong Wi-Fi.
- You want a full migration, not a few files.
- You do not need to keep using either iPad during transfer.
When Quick Start is not enough
Quick Start is not ideal if the new iPad is already set up and full of new data. To run a full restore path after setup, Apple usually requires erasing the new iPad first.
It is also not the right tool for selective transfer. If you only want 300 photos, a few PDFs, one playlist, or a local backup on your Windows PC, Quick Start is too much. Use AirDrop, Files, Apple Devices, Finder, or AltTunes instead.
Method 2: How to Transfer iPad to iPad with iCloud Backup
iCloud Backup is a practical way to transfer iPad to iPad when you have a current backup but cannot keep both devices together. It restores the old iPad backup during setup.
This method works well for full migration, but it depends on Wi-Fi, iCloud storage, and backup quality.
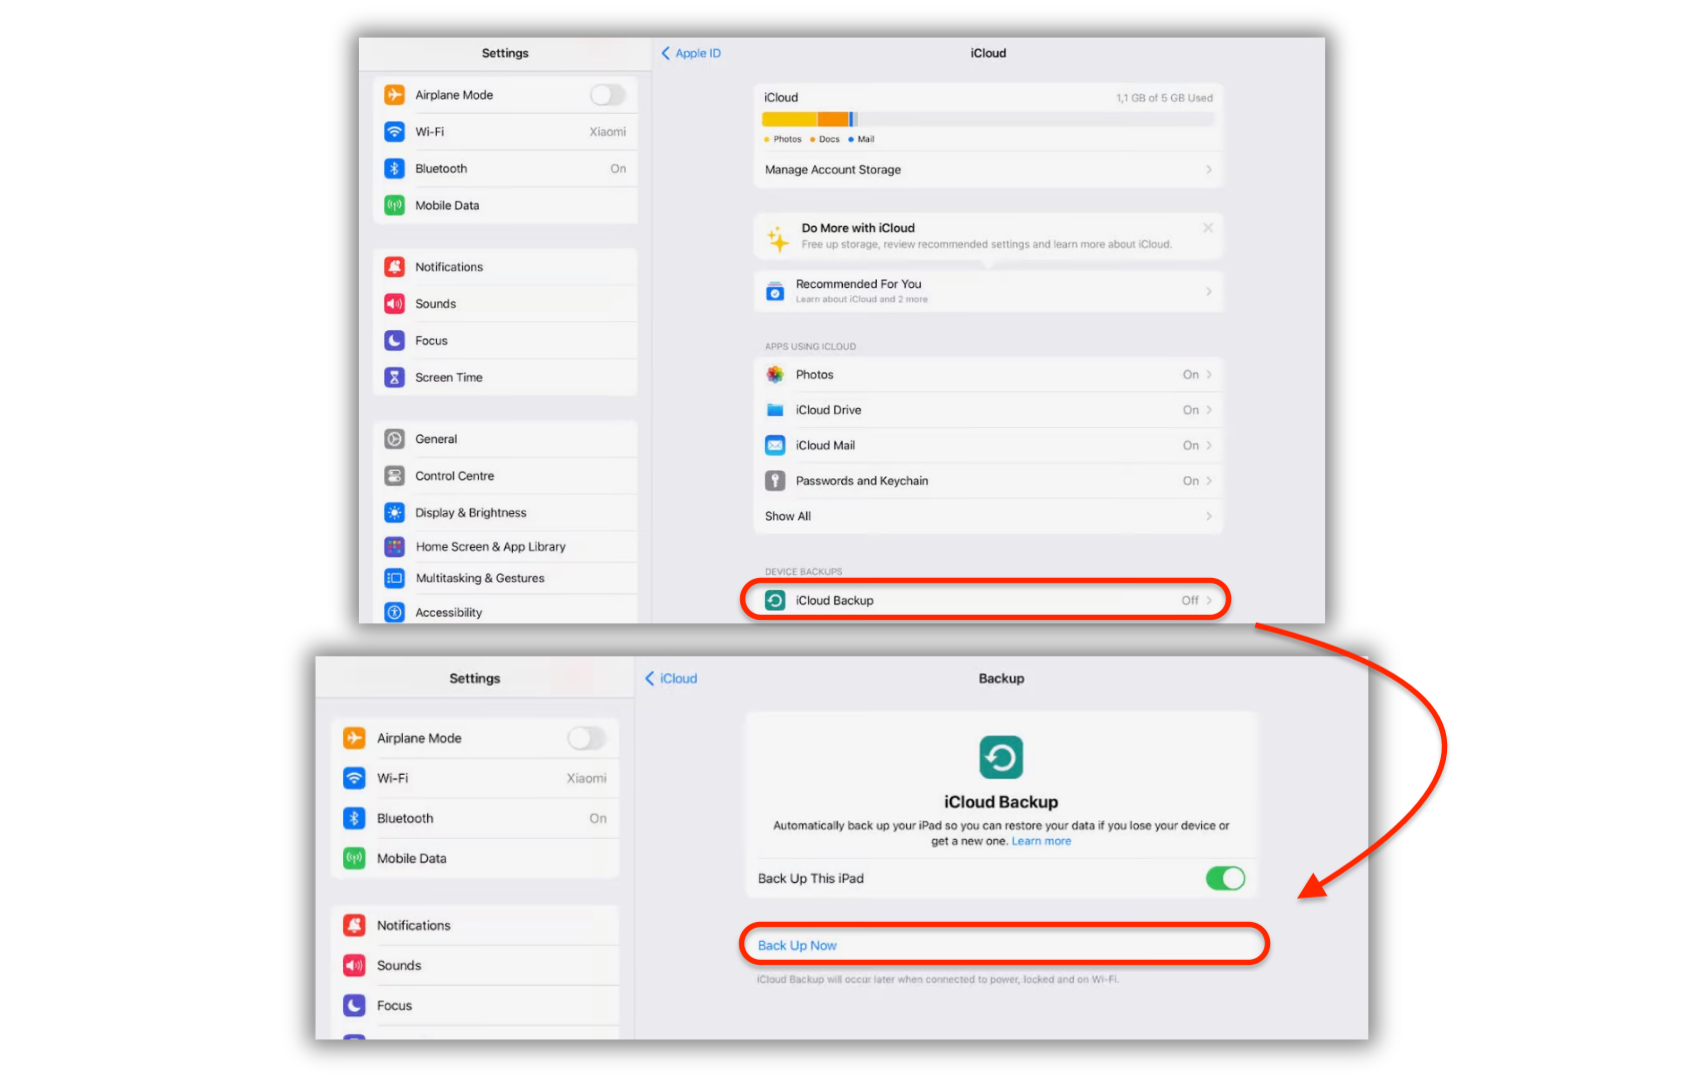
Back up your old iPad to iCloud
- Connect the old iPad to Wi-Fi.
- Open Settings.
- Tap your name.
- Tap iCloud.
- Tap iCloud Backup.
- Turn on iCloud Backup if it is off.
- Tap Back Up Now.
- Wait until the backup finishes.
Do not skip the wait. A half-finished backup is how you end up wondering why photos, messages, or app data did not move.
Restore the iCloud backup on the new iPad
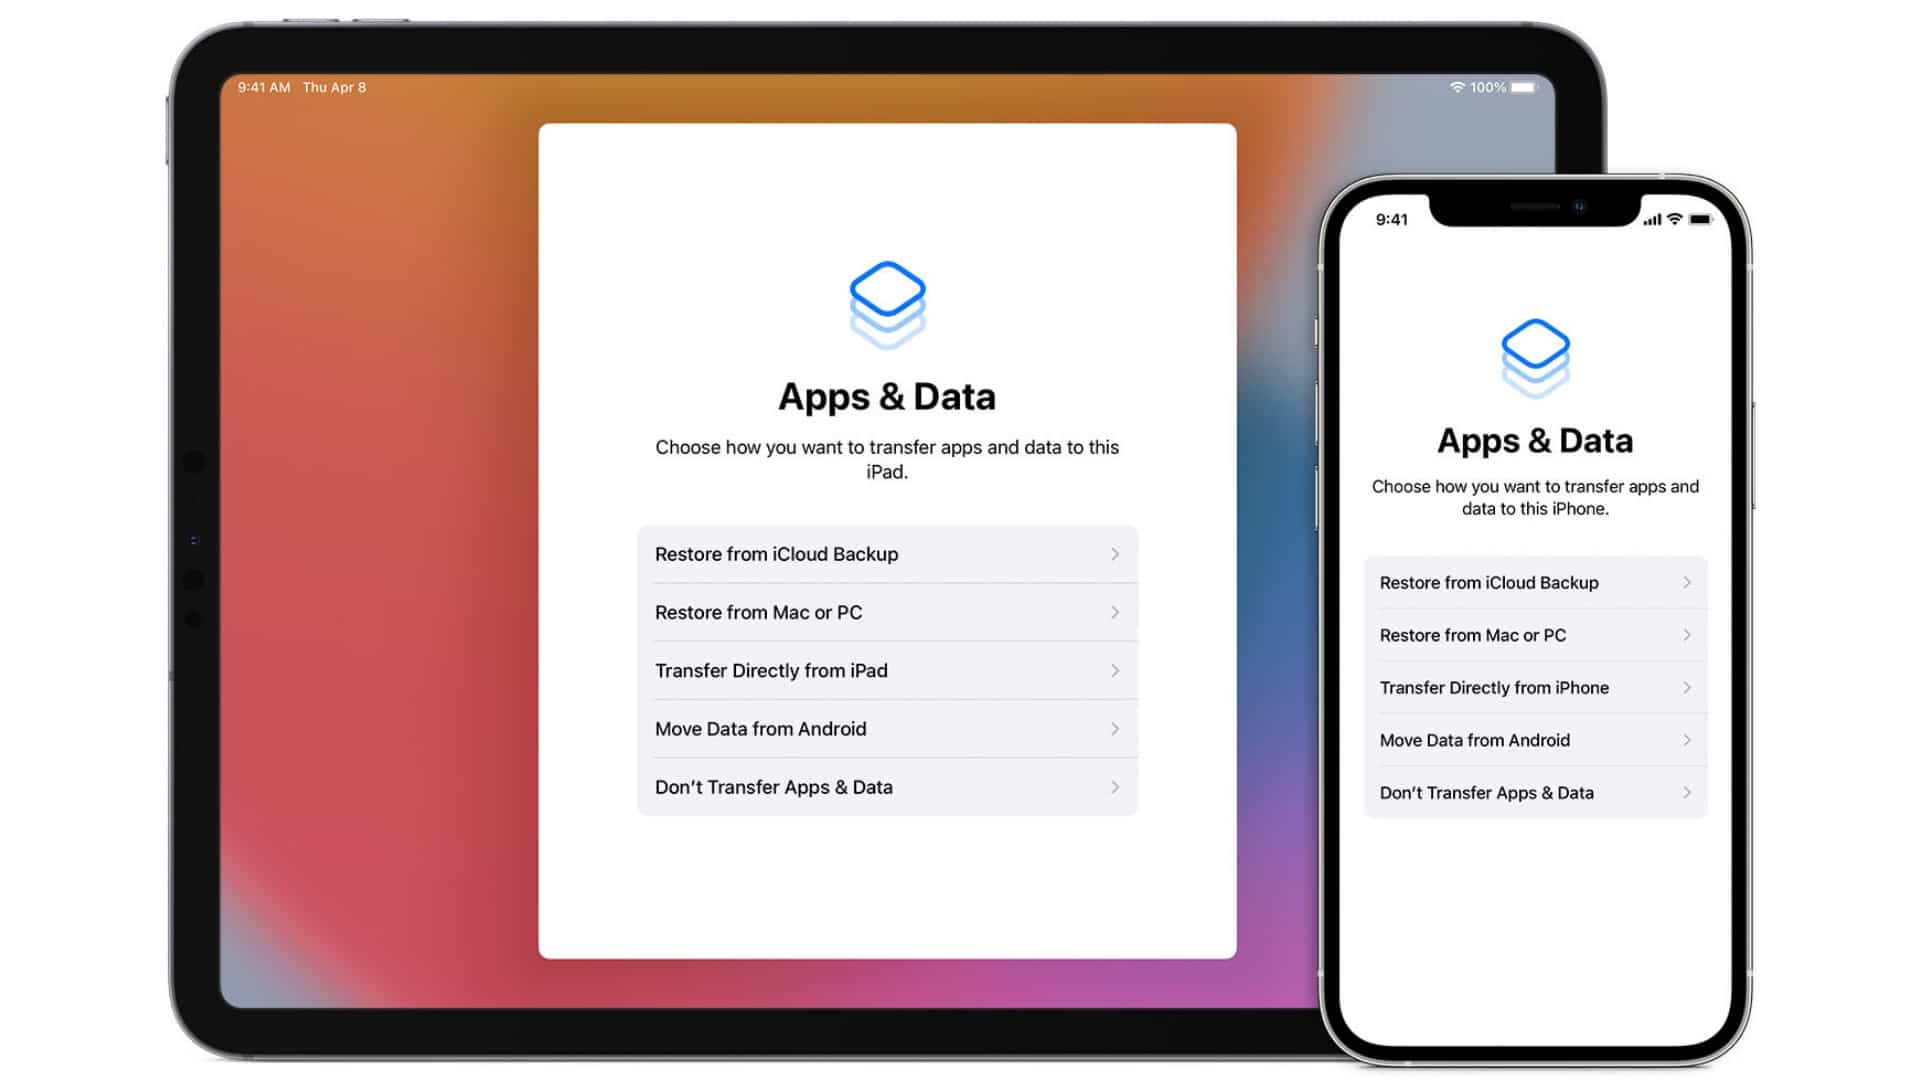
Apple states the important part clearly: if your new iPad is already set up, you need to erase it before using the standard iCloud restore steps. That is fine for a blank iPad. It is painful if you already started using the new device.
- Turn on the new iPad.
- Follow setup until you reach Apps & Data.
- Tap Restore from iCloud Backup.
- Sign in with the same Apple Account.
- Pick the most recent backup.
- Keep the new iPad connected to Wi-Fi and power.
- Wait for restore to finish, then let apps and media continue downloading.
When iCloud Backup fits
Use iCloud Backup when: the old iPad has a current backup, the new iPad is new or erased, and you have reliable Wi-Fi. You do not need the old iPad beside you during restore.
The limits are storage and time. Apps and cloud content may continue downloading after setup. A full restore to an already configured new iPad normally requires an erase first.
Eligible buyers who lack enough storage can use Apple's temporary iCloud backup. Apple currently gives you 21 days to restore that temporary backup. Do not erase the old iPad before the restore and verification are complete.
Method 3: Transfer iPad to iPad with a Cable
A cable may make setup more stable, but wired support depends on both iPad models, their ports, the cable or adapter, and the choices shown during setup. Apple's current Quick Start page does not provide a universal iPad-to-iPad cable matrix.
Use a cable only when: the exact device pair and on-screen setup flow support it. If you cannot verify the combination, use wireless Quick Start instead of buying adapters by guesswork.
What you need for wired transfer
Check the ports on both iPads and Apple's setup instructions for the exact pair. A USB-C-to-USB-C cable may fit newer models, while a Lightning model may need a different cable or adapter. A physical fit alone does not prove that setup supports direct migration.
Keep both iPads charged. If the expected wired option does not appear, disconnect the cable and continue with wireless Quick Start.
Wired transfer steps
Wired migration still works as a setup flow. It does not turn an already-used iPad into a merge target. If the new iPad already has important data, back it up before you erase or restore anything.
- Turn on the new iPad.
- Place it beside the old iPad.
- Start Quick Start.
- Connect the iPads with the supported cable or adapter.
- Follow the on-screen instructions.
- Keep both iPads connected until transfer finishes.
Method 4: Use Finder, Apple Devices, or iTunes for a Local Backup Restore
Use a computer backup when you want a full local restore without iCloud. This path takes more steps than Quick Start. An encrypted backup also preserves Health and Activity data that Apple says an unencrypted computer backup does not transfer.
Use the right app for your computer:
Computer | App to use |
|---|---|
Mac with macOS Catalina or later | Finder |
Windows 10 or later | Apple Devices app |
Older Mac or older Windows setup | iTunes |
Back up the old iPad to your computer
- Connect the old iPad to your Mac or Windows PC.
- Open Finder, Apple Devices, or iTunes.
- Select the iPad.
- Choose Back Up Now.
- Select encrypted backup if you need data like saved passwords and sensitive app data included.
- Save the encryption password somewhere safe.
If you lose the encrypted backup password, you can make your day worse in 4 seconds. Store it somewhere you trust.
Restore the backup to the new iPad
This is a full restore path. If the new iPad already has data, restoring the old backup can replace it. Back up the new iPad before you continue. Apple's computer-backup restore guide covers the current Finder, Apple Devices, and iTunes flow.
- Connect the new iPad to the computer.
- Open Finder, Apple Devices, or iTunes.
- Select the new iPad.
- Choose Restore Backup.
- Pick the latest backup from the old iPad.
- Enter the encrypted backup password if needed.
- Keep the iPad connected until restore finishes.
Method 5: Use AirDrop, Files, or iCloud Drive for Selected Files
Sometimes you do not need a full iPad migration. You need to transfer a PDF, a folder, a few videos, or a batch of photos.
For that, use a file-level method.
Use AirDrop for nearby Apple devices
AirDrop is best for a small batch of photos, PDFs, links, and documents.
- Turn on Wi-Fi and Bluetooth on both iPads.
- Open the file, photo, link, or document on the old iPad.
- Tap Share.
- Tap AirDrop.
- Choose the new iPad.
- Accept the transfer on the new iPad.
AirDrop does not transfer apps, app data, settings, messages, passwords, or the whole iPad state. It moves selected items. That is the point.
Use Files or cloud storage for documents
The Files app works well for documents already saved in iCloud Drive, external storage, file servers, Box, Dropbox, or another cloud service.
Move the files into a shared cloud folder on the old iPad, then open the same folder on the new iPad. If both iPads use the same Apple Account, iCloud Drive can keep files in sync.
Apple warns in its iPad file transfer guide that file transfer can be restricted for some files, including proprietary app formats, older software files, and copyright-protected content. If a file refuses to move, the file itself may be the problem, not the iPad.
Method 6: Use AltTunes for Selective iPad Backup and Transfer on Windows
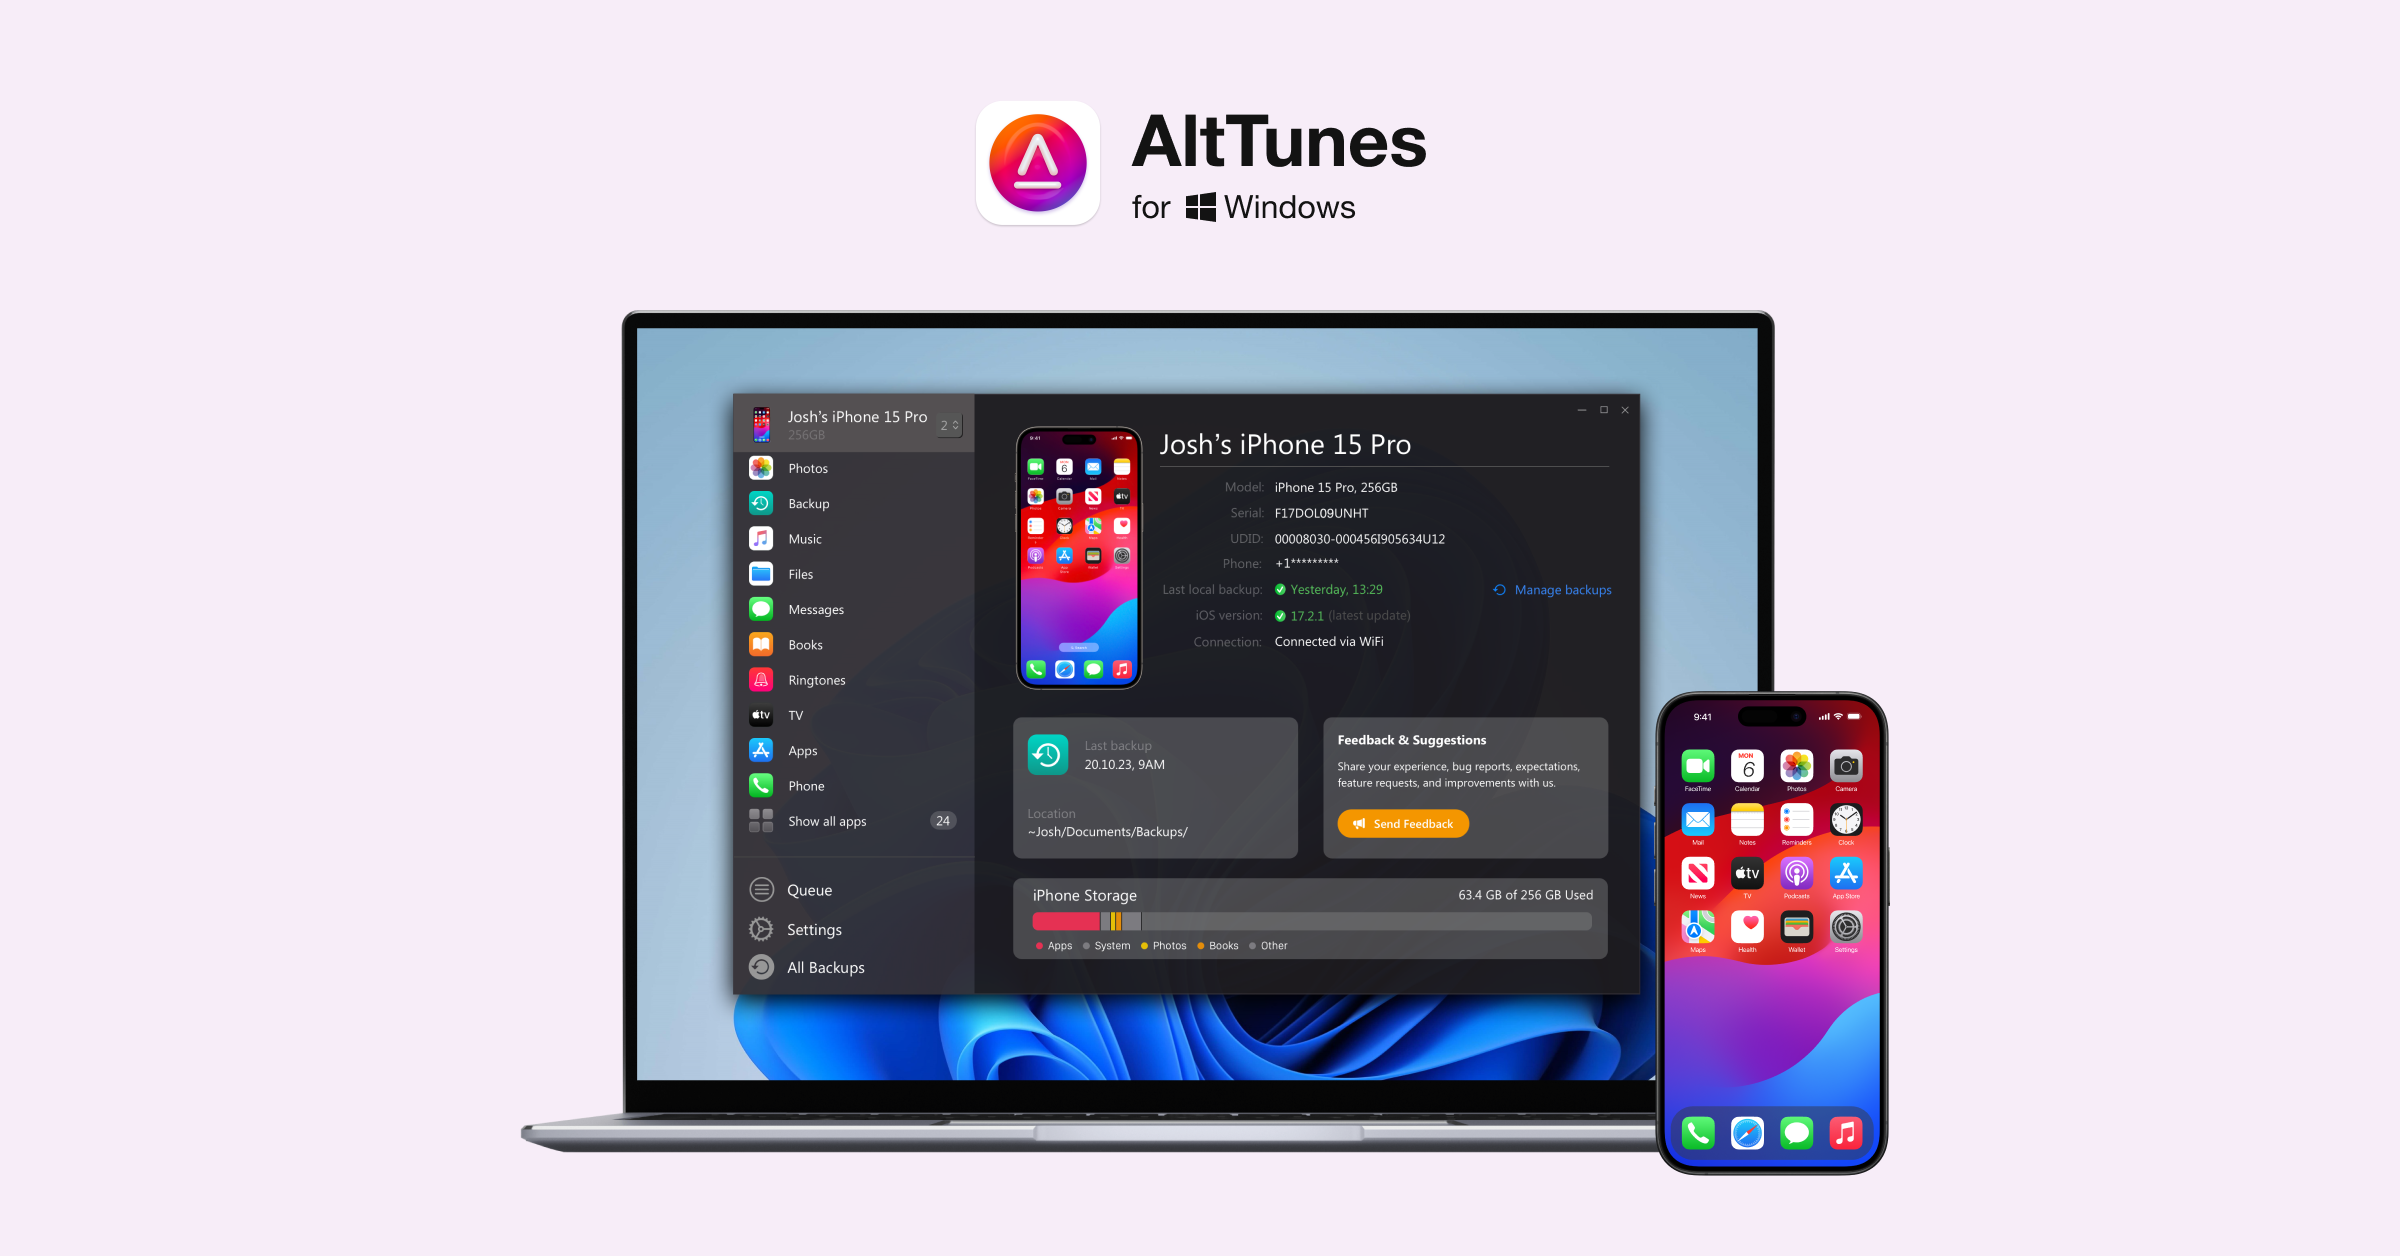
AltTunes is the Windows option for local iPad backup, backup browsing, export, clone, and supported restore. It does not replace Apple's full Quick Start migration. Use it when you want category-level control or a local copy before changing the destination iPad.
Use AltTunes when you want to:
- Local iPhone or iPad backups on a Windows PC or external storage.
- User-controlled backup locations and browsing for old iOS backups.
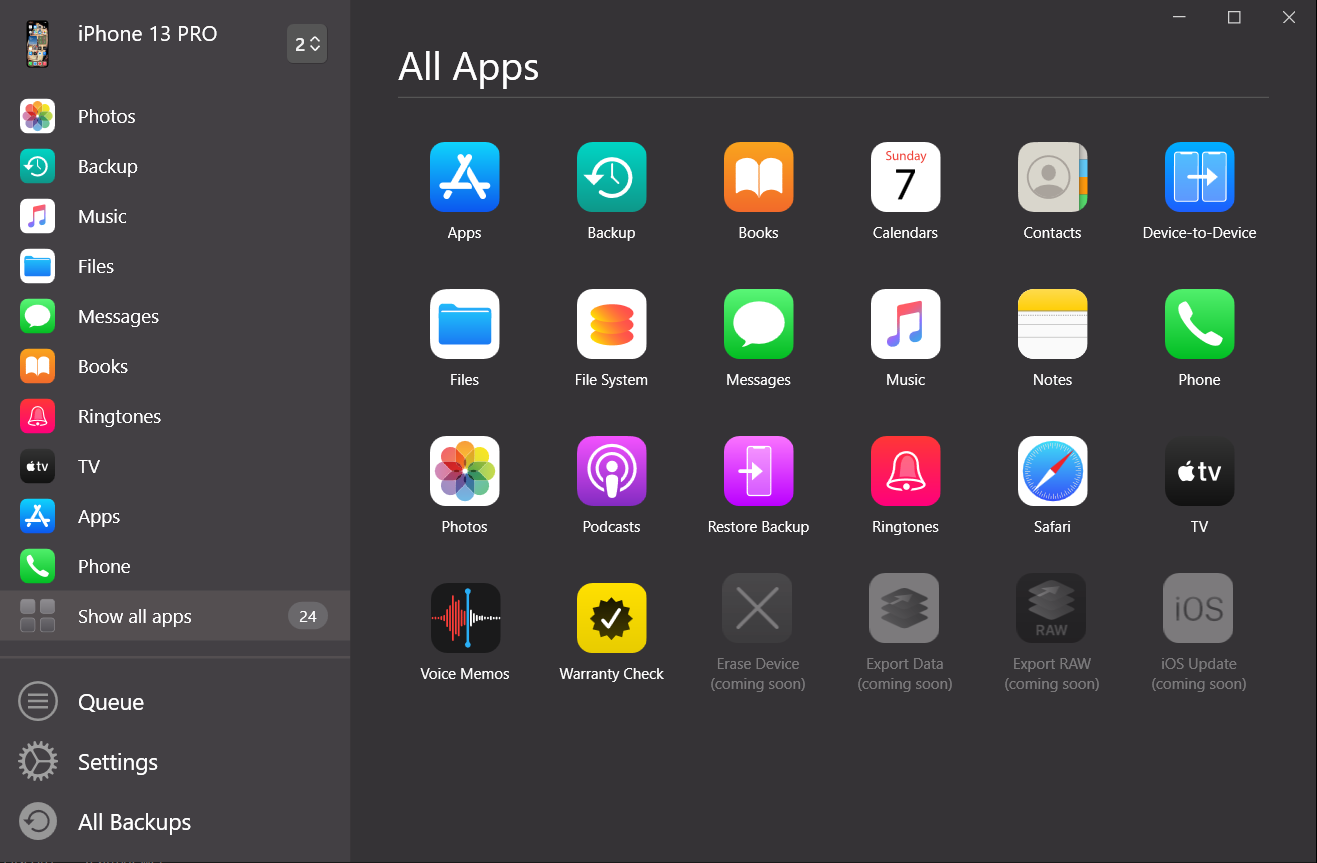
- Category exports for photos, videos, music, messages, contacts, notes, files, and books.
- HEIC-to-JPEG conversion during photo export.
- Supported iOS data cloning or restoration to a connected device.
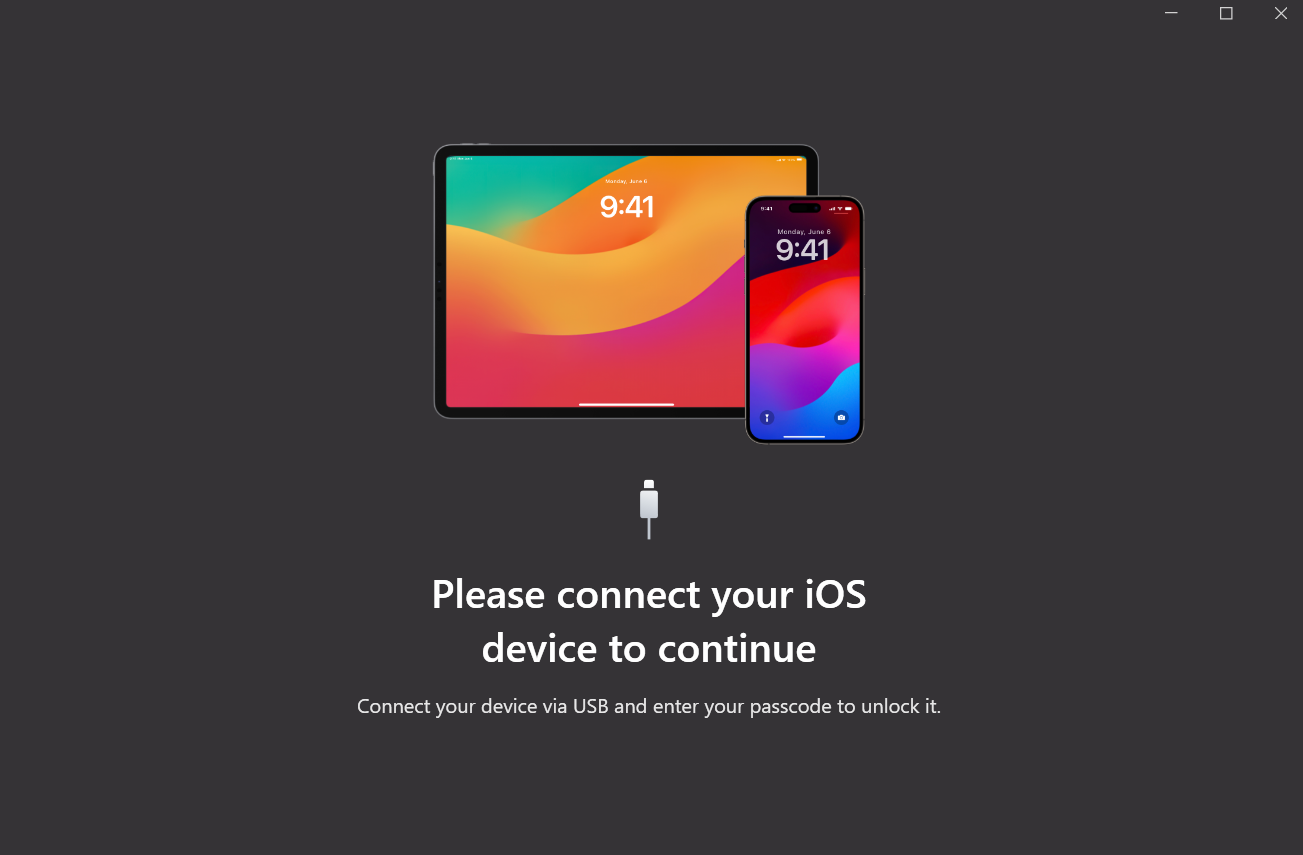
AltTunes supports Windows 10 and Windows 11 and connects to iPhone or iPad by cable. The preserved screenshots show the desktop connection and category workflow. That makes the product useful here without pretending it replaces Apple setup.
How to use AltTunes in an iPad transfer workflow
- Download AltTunes for Windows and install it.
- Connect the old iPad to the PC with a cable.
- Trust the computer on the iPad if iPadOS asks.
- Create a local backup or export the categories you need.
- Check that the backup or exported files exist on the PC or external drive.
- Connect the new iPad when you need a supported restore, clone, or import workflow.
- Keep the old iPad and local copy until you have verified the new device.
This fits when you want local control and do not want to erase an already configured iPad for a full Apple restore. AltTunes can handle supported data categories, not a clean merge of every app, setting, password, and purchased item from 2 device states.
Where AltTunes is better than iCloud or Quick Start
AltTunes is stronger when you care about control:
- You want selected categories, not a full-device restore.
- You want photos, videos, music, contacts, messages, notes, or files on your PC.
- You want a local backup, not a cloud backup.
- You use Windows and do not want the iTunes workflow.
- You want to browse backup contents before deciding what to export.
Where AltTunes is not the right tool
Do not use AltTunes as a fake shortcut for everything.
If you want a full new-device migration during setup, start with Quick Start. If you want a full iCloud restore, use iCloud Backup. If you need Apple to re-download apps, Apple settings, and purchased content during setup, stay inside Apple's migration flow.
AltTunes fits the selective and local-control job. That is still a big job.
What Transfers from iPad to iPad?
The answer depends on the method.
Quick Start, iCloud Backup, and computer backup restore can move most of your device state. That can include apps, settings, photos, messages, Apple Account setup, and purchased content. Some content may re-download from Apple or iCloud after setup.
AirDrop, Files, and cloud storage move selected items. They are good for photos, PDFs, documents, links, and app-supported files. They do not move your whole iPad setup.
AltTunes helps with local backup, browsing, export, and supported restore workflows for iPhone and iPad data on Windows. It is strongest when you need control over categories instead of a full wipe-and-restore.
Why iPad Transfer Fails or Gets Stuck
Most iPad transfer problems come from boring causes. Check these first.
Quick Start does not appear
Turn Bluetooth and Wi-Fi on so Quick Start can discover the nearby iPad. Bluetooth alone does not carry the full migration. Restart both iPads. Keep the devices close together. Make sure the new iPad is on the setup screen, not already sitting on the Home Screen.
Transfer is slow
Plug both iPads into power. Move closer to the Wi-Fi router. If your devices support it, consider a wired transfer. Large photo libraries and app data can take a while.
iCloud restore says there is not enough storage
Check your iCloud plan and backup size. If you bought a new iPad, Apple may offer temporary iCloud storage for transfer. If you do not want more iCloud storage, use a computer backup or AltTunes for local backup/export.
Some apps or files are missing
Apps may need to re-download from the App Store. Some app data depends on the app developer, cloud sync, account login, or backup type. Files in proprietary formats or DRM-protected media may not transfer the way normal documents do.
The new iPad is already set up
Decide before you erase anything. If you need full migration from backup, Apple's restore paths may require erasing the new iPad. If you only need selected files or categories, use AirDrop, Files, Apple Devices, Finder, or AltTunes instead.
Best Way to Transfer iPad to iPad Without iCloud
Use Quick Start direct transfer if the new iPad is new or erased and both devices are nearby. That avoids iCloud Backup as the main restore path.
Use Finder on Mac or Apple Devices on Windows if you want a full local backup and restore. Choose an encrypted backup when you need Health and Activity data included. See the full guide to restore an iPad from backup before erasing an already configured device.
Use AltTunes if you are on Windows and want a local backup/export workflow with more control over categories like photos, music, messages, contacts, notes, files, videos, and backups.
Use AirDrop or Files if you only need a few items. For music already on a computer, follow the separate guide to transfer music from a computer to iPad.
Best Way to Transfer iPad to iPad After Setup
You have 2 choices after setup.
First, you can erase the new iPad and use Quick Start, iCloud Backup, or a computer backup restore. This is the clean full-migration path, but it removes current data from the new iPad.
Second, you can keep the new iPad as-is and transfer selected items. Use AirDrop for small batches, Files or cloud services for documents, Finder or Apple Devices for supported file sharing, and AltTunes for Windows-based local backup, export, and restore workflows.
If you already spent a week setting up the new iPad, do not wipe it casually. Back it up first, then choose the least destructive method.
Final iPad Transfer Recommendation
If your new iPad is still at setup, use Quick Start first. It is Apple's best answer for how to transfer iPad to iPad in 2026.
If you need a cloud restore, use iCloud Backup. If you want local backup control, use Finder, Apple Devices, or iTunes. If you need selected files, use AirDrop or Files.
If you use Windows and want to back up, browse, export, clone, or restore supported iPad data without iCloud, try AltTunes for local iPad control. It stays in its lane and does not pretend Apple's setup rules do not exist.
Verify the New iPad Before You Erase the Old One
Do not erase or trade in the old iPad yet. Open Photos, Messages, Files, Notes, and the apps you care about on the new iPad. Check recent items, sign in where needed, and confirm cellular service if the iPad has it.
Keep the old iPad powered off but intact for a few days if your schedule allows. Once the new device has the expected data and your local or cloud backup is usable, follow Apple's erase steps. If you plan to keep it, see how to reuse or prepare an old iPad.
Frequently Asked Questions About iPad Transfer
What is the easiest way to transfer iPad to iPad?
Quick Start is the easiest way to transfer iPad to iPad when the new iPad is brand new or erased. Put both iPads next to each other, follow the setup prompts, and choose the transfer option that fits your connection.
Can I transfer data to a new iPad after setup without erasing it?
You can transfer selected data after setup without erasing the new iPad. Use AirDrop, Files, iCloud sync, Apple Devices, Finder, or AltTunes depending on the data type. A full Apple backup restore after setup usually requires erasing the new iPad first.
How do I transfer iPad to iPad without iCloud?
Use Quick Start direct transfer during setup, a wired transfer if supported, or a local computer backup with Finder, Apple Devices, or iTunes. Windows users can also use AltTunes for local iPad backup, export, and supported restore workflows without relying on iCloud.
Can I transfer apps from iPad to iPad?
Quick Start, iCloud restore, and computer backup restore can bring your apps back during setup. Some app data depends on iCloud, the app developer, account login, or backup type. AirDrop and Files do not transfer installed apps.
Can I transfer only photos from one iPad to another?
Yes. Use AirDrop for a small batch, iCloud Photos for library sync, Files for saved documents, or AltTunes on Windows if you want to export iPad photos and videos to a PC first. Choose the method based on whether you want a quick copy or a local archive.
How long does iPad to iPad transfer take?
Transfer time depends on Wi-Fi quality, device storage, backup size, and method. A small iPad may finish quickly. A large photo library or full direct migration can take much longer. Keep both iPads plugged in until the process finishes.
Why is Quick Start not showing on my old iPad?
Quick Start may not appear if Bluetooth or Wi-Fi is off, the devices are too far apart, the new iPad is already set up, or one device needs a restart. Turn on Wi-Fi and Bluetooth, restart both iPads, and place them side by side.
Is AltTunes a full replacement for Quick Start?
No. AltTunes is better for Windows-based local backup, export, browsing, and selective data workflows. Use Quick Start when you want Apple's full setup migration from one iPad to another.

AltTunes
Seamlessly Browse, Manage & Export iOS Data
