How to Convert WAV to M4A in 2025

WAV is a supported format on Mac and other Apple devices, but many users prefer M4A files because they're much smaller while still maintaining high-quality audio. Converting from WAV to M4A helps save valuable disk space and makes sharing audio files easier. This article walks through your conversion options, highlighting WALTR PRO as a user-friendly solution alongside other methods like VLC Media Player and iTunes for Windows.
WAV vs. M4A: Key Differences
WAV (WAVE) files are standard lossless audio formats typically stored in 44.1 kHz, 16-bit, stereo format—similar to CD quality. While they maintain perfect audio fidelity, their massive size (30-50MB for a 3-minute song) makes them impractical for sharing or storage on space-limited devices.
M4A files, by contrast, are MPEG-4 audio standard files that can be encoded with either ALAC (lossless) or AAC (lossy) compression. Apple popularized this format with iPod and iTunes to distinguish between audio and video MP4 files. M4A files take up significantly less space while maintaining excellent sound quality, making them ideal for digital music, podcasts, and audiobooks.
Format Comparison
Format | Compression | Quality | File Size | Compatibility |
|---|---|---|---|---|
WAV | ❌ None | 🌟 Perfect | 📈 Large | ✅ Universal |
M4A | ✅ Lossy/Lossless (AAC/ALAC) | 🔥 Excellent | 📉 Small | 🍎 Best with Apple, 🌐 widely supported |
While M4A offers significant advantages for everyday users, WAV remains the preferred format in professional audio editing environments. Sound engineers and music producers often work with WAV files due to their uncompressed nature, which provides the highest possible fidelity for mixing, mastering, and detailed audio work. If you're involved in professional audio production, you might want to keep original WAV files as your master copies even while creating M4A versions for distribution.
Converting WAV to M4A: Your Options
There are several ways to convert WAV to M4A and convert M4A WAV. The most common methods include VLC Media Player, iTunes, or Windows Media Player. Some users also use online audio and video converter tools to convert their WAV files to M4A.
This article will discuss all of these methods. However, our top-favorite method involves using a new, revolutionary desktop application: WALTR PRO. Keep reading to learn more about how this app works!
Option 1: WALTR PRO (Mac & Windows)
WALTR PRO offers the simplest solution for converting WAV to M4A with a straightforward drag-and-drop process.
How to use WALTR PRO:
1. Download and install WALTR PRO.
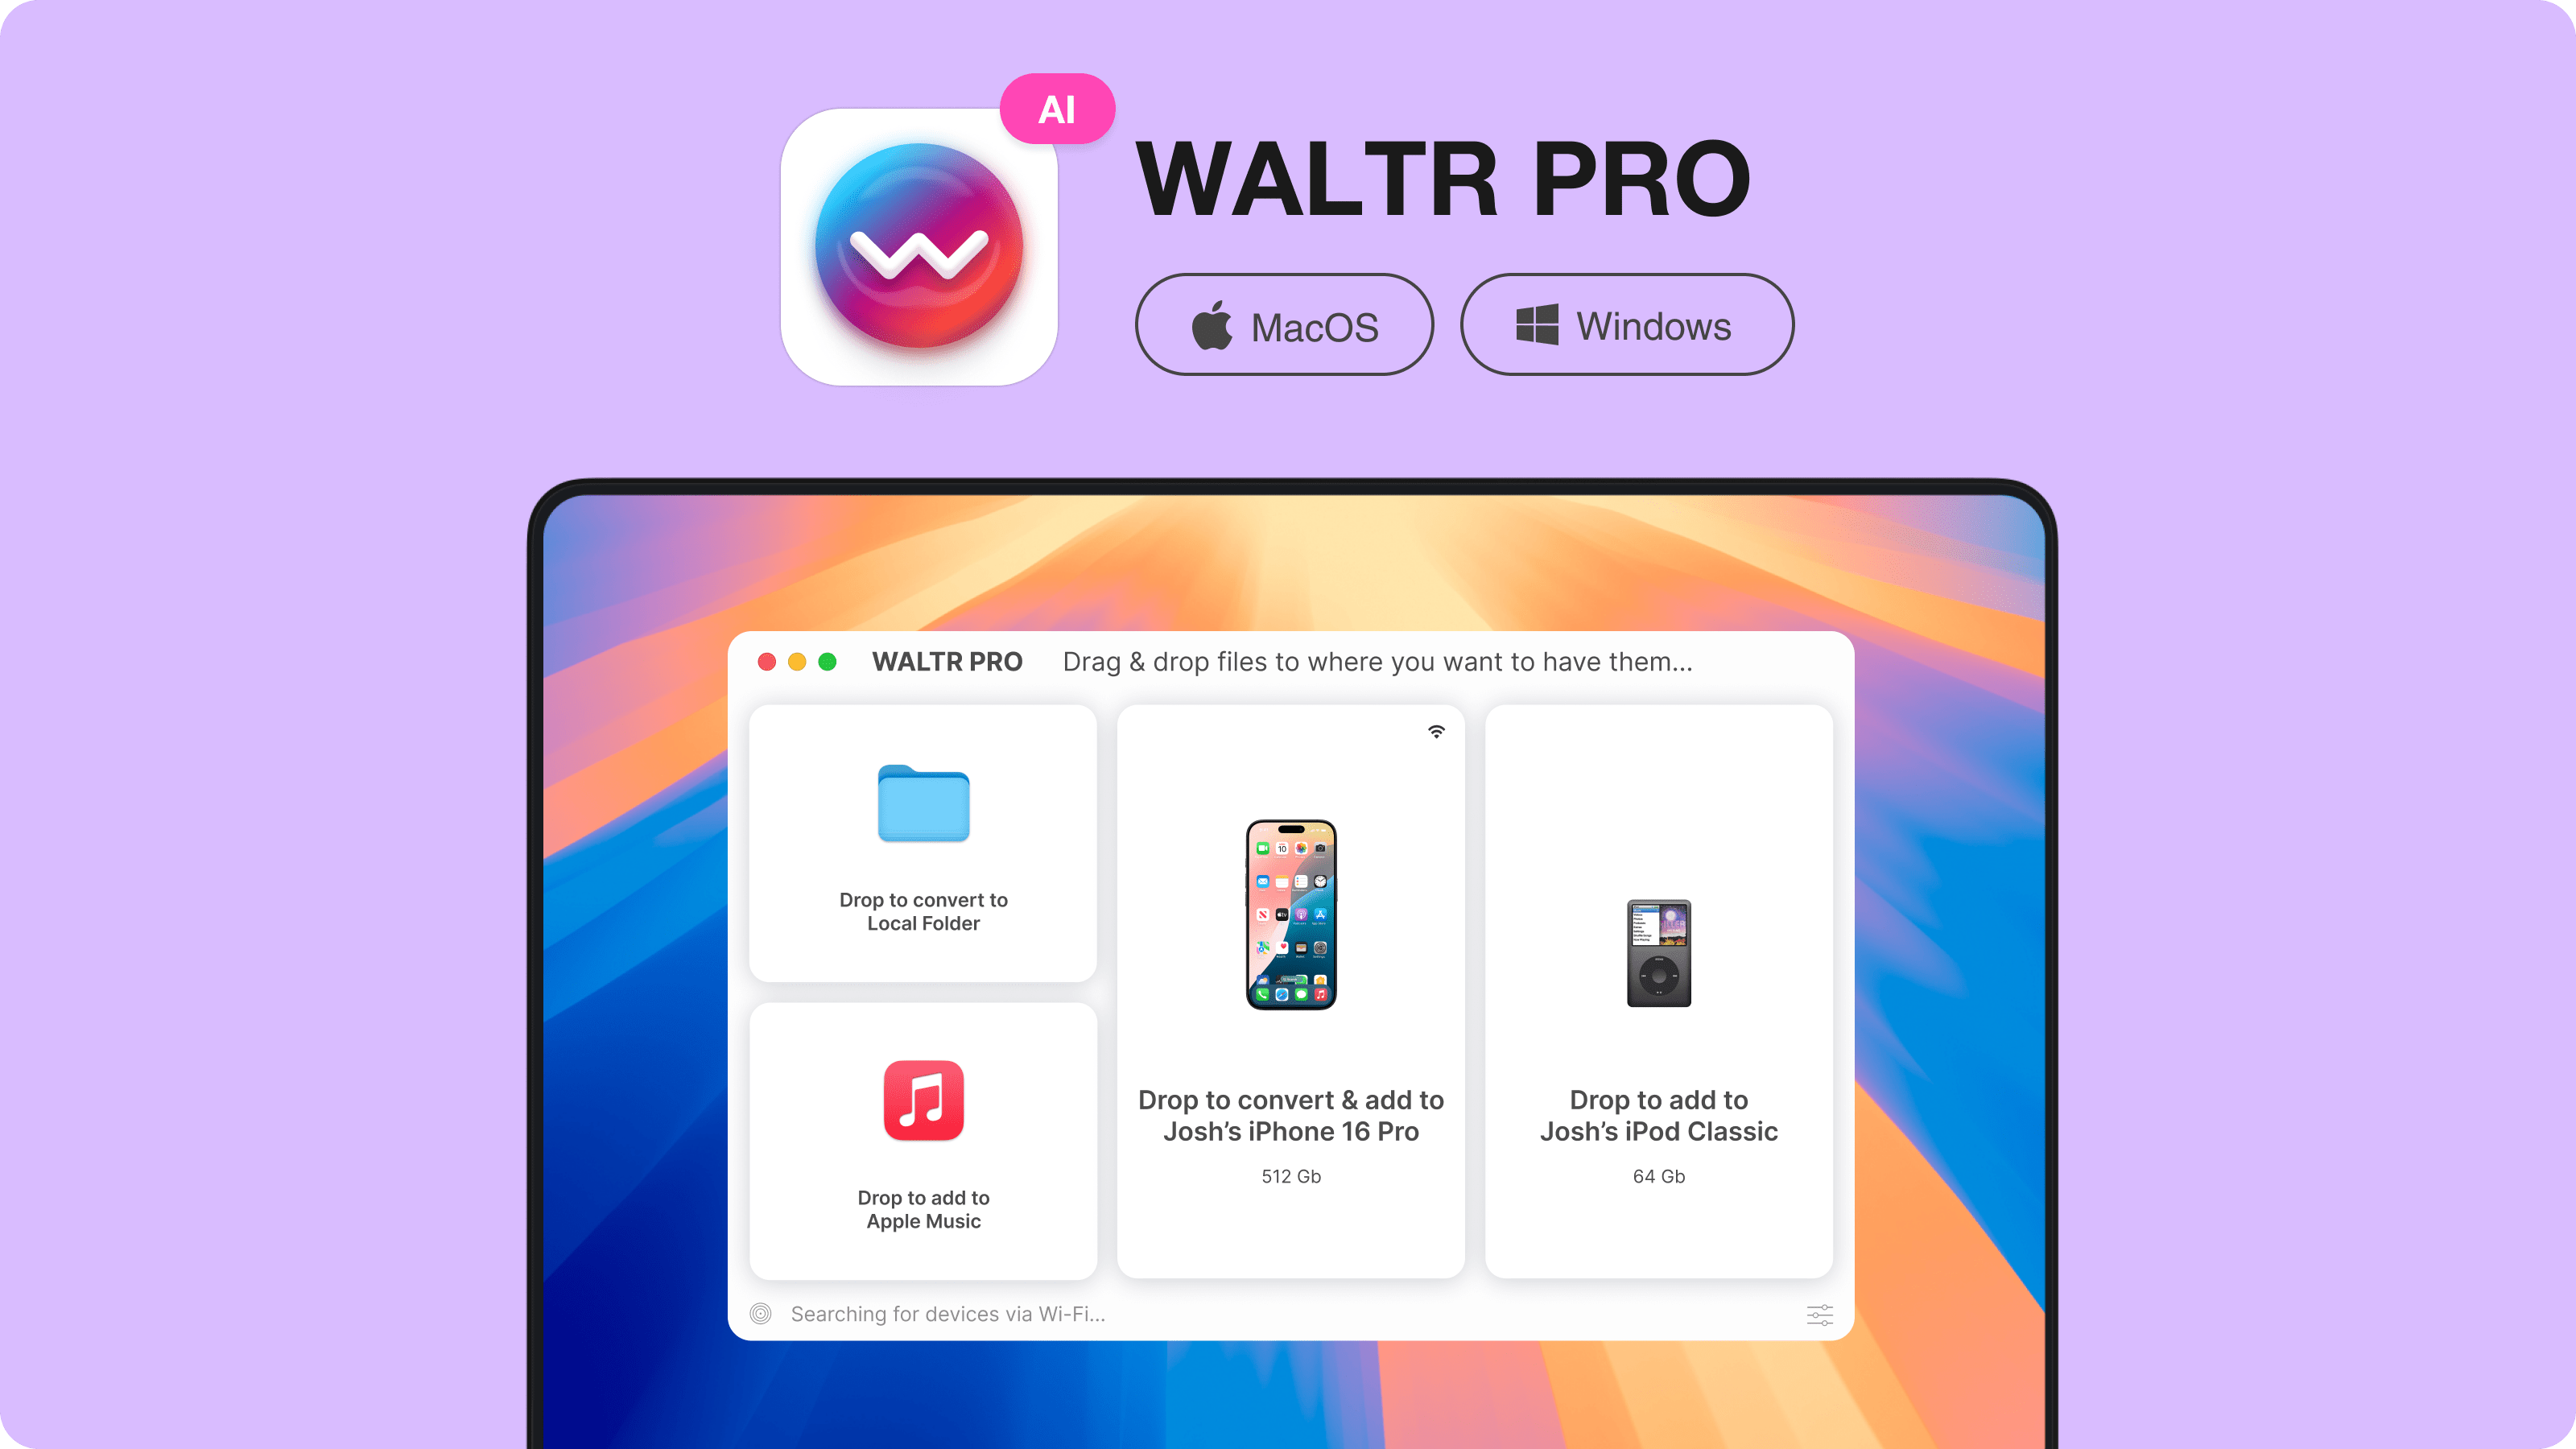
Start with a free trial by downloading WALTR PRO for Mac or Windows and entering the trial key sent to your email.
2. Connect your devices (optional)
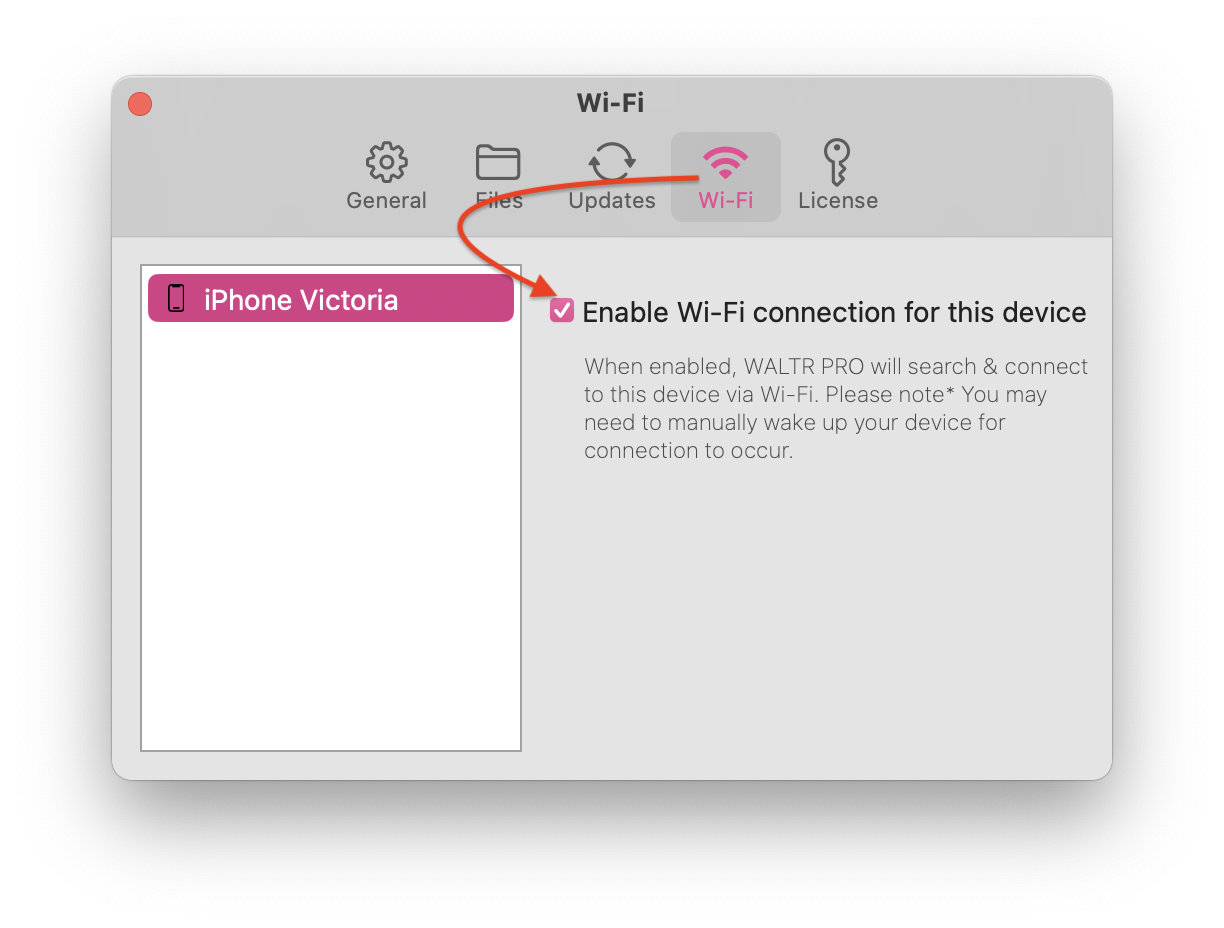
Skip this step if you want to save files on your computer. To transfer files directly to iOS devices, connect via USB or enable WiFi connectivity in the settings.
3. Drag and drop your WAV files.
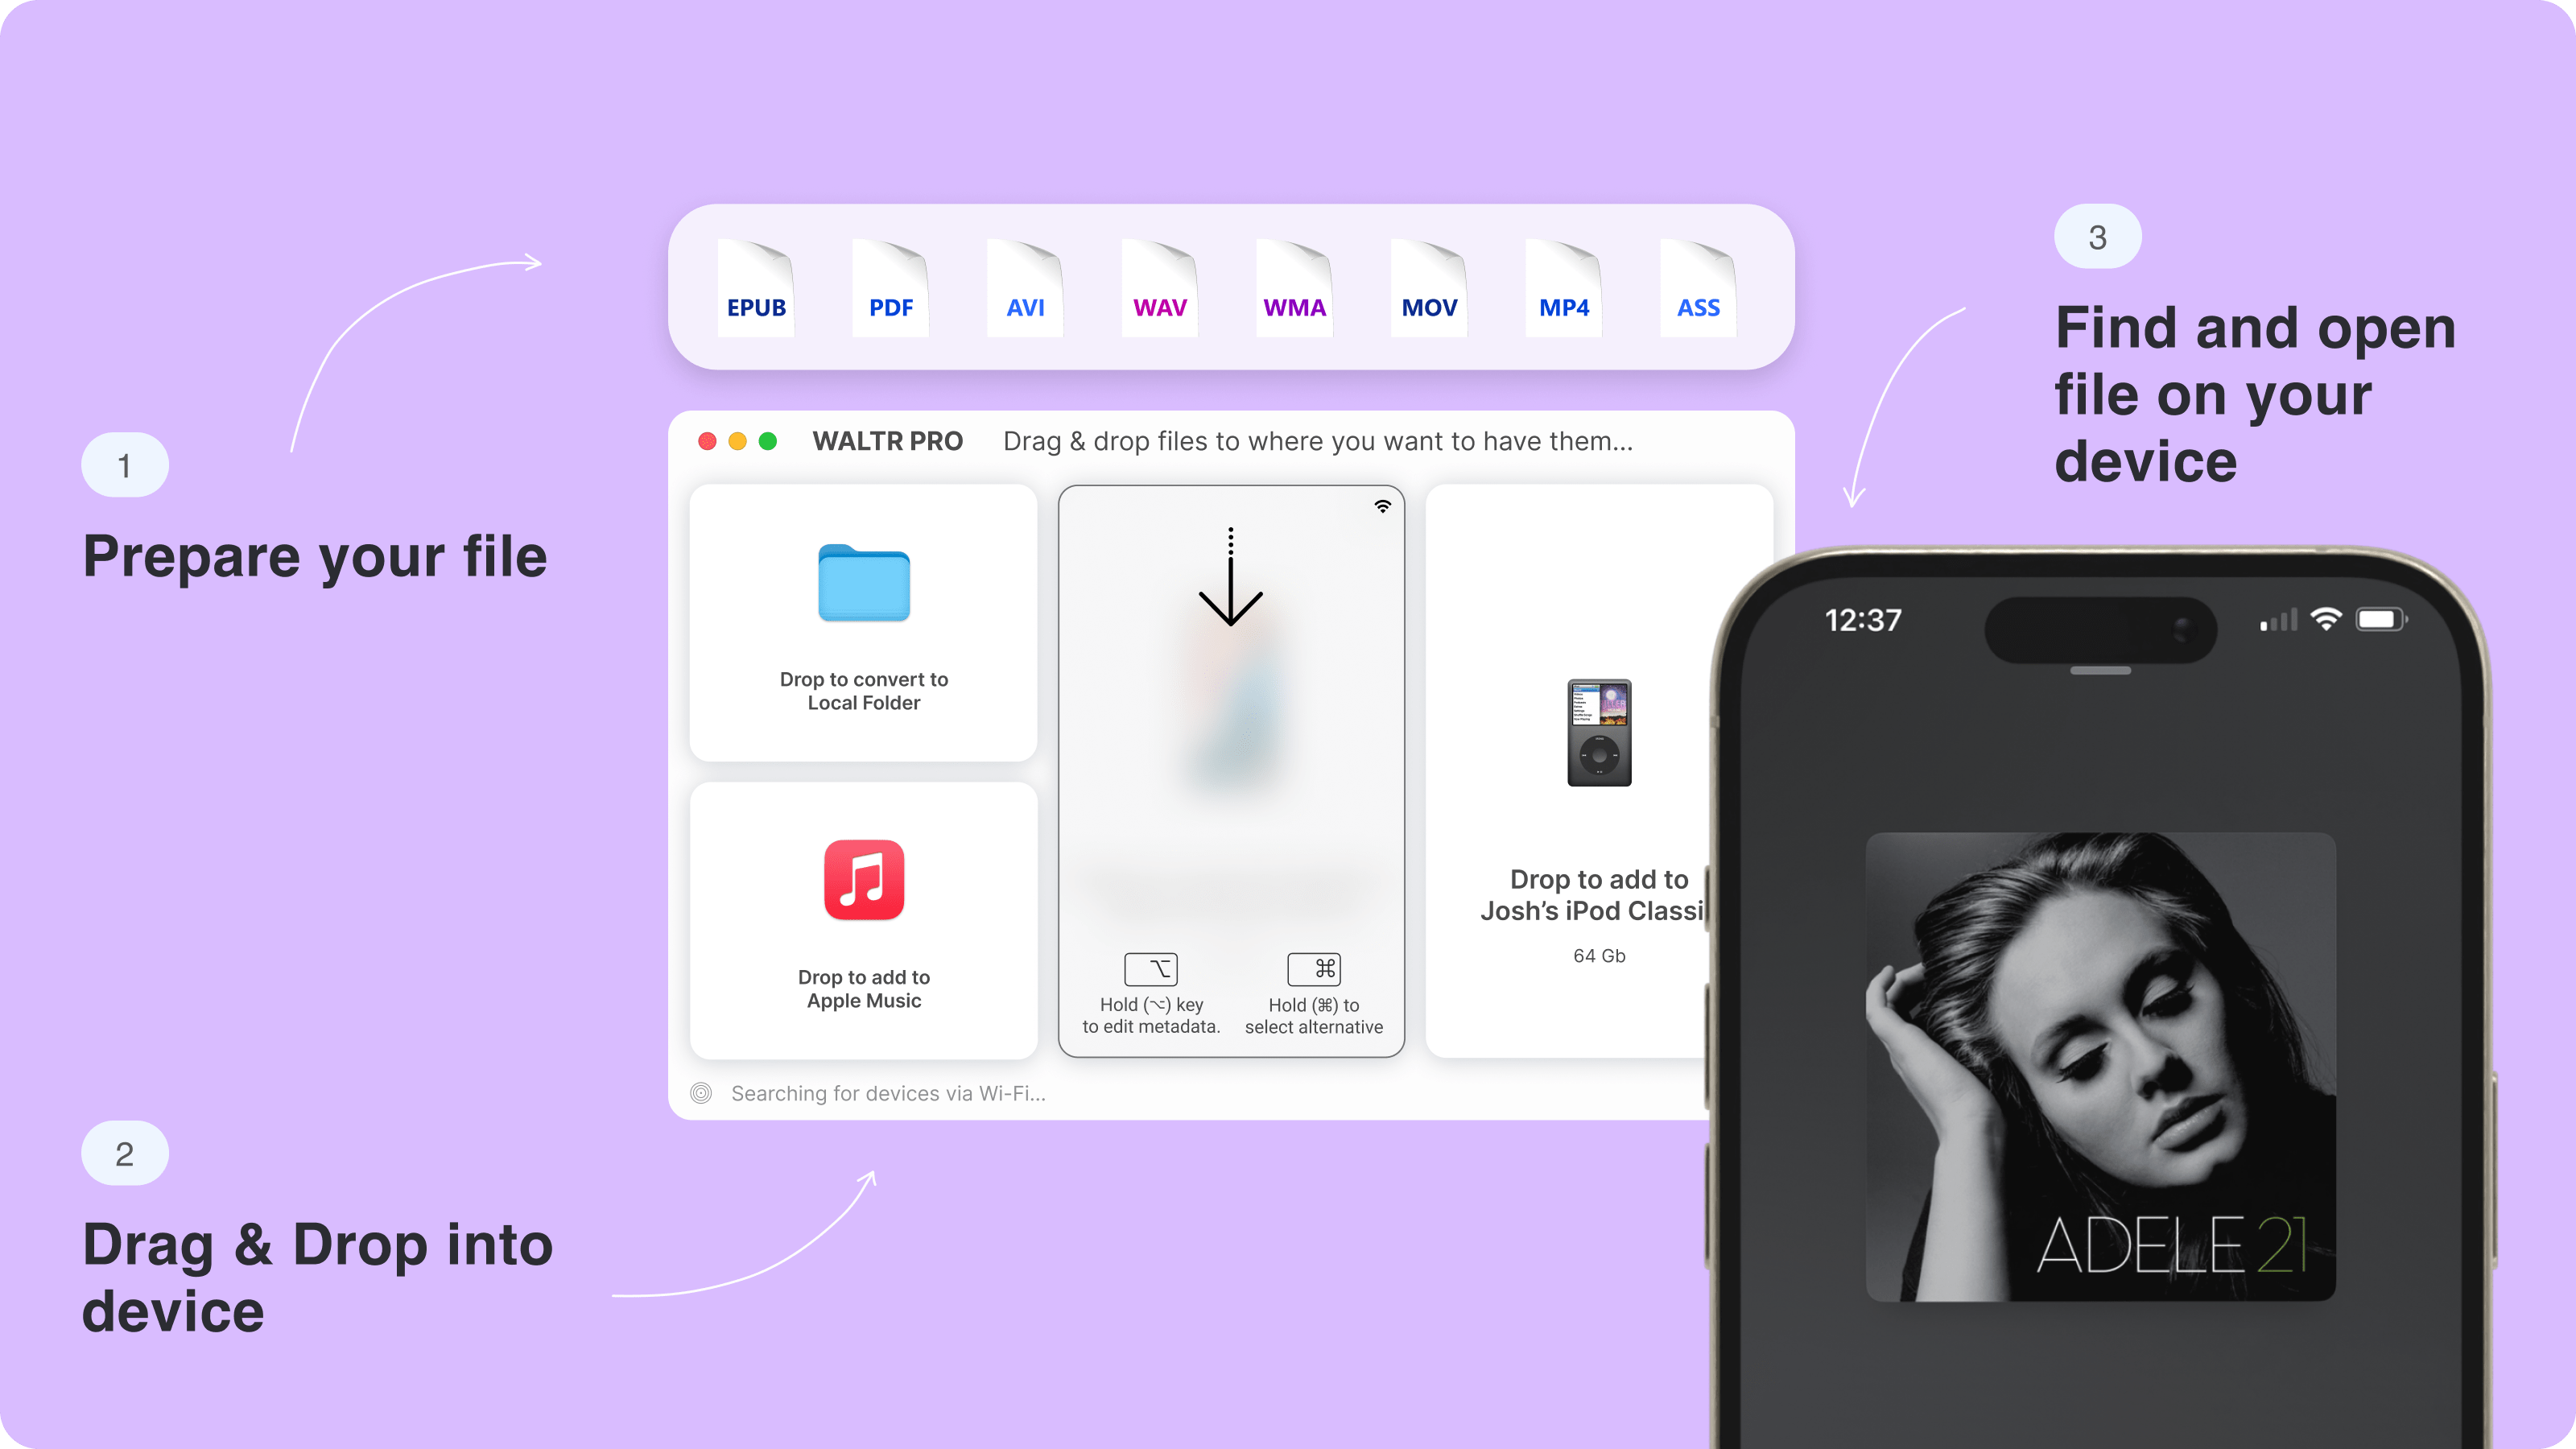
Simply drop your WAV files into the WALTR PRO interface, and the app handles the conversion automatically. The process takes just seconds, and you can transfer the resulting M4A files directly to your iOS devices.
WALTR PRO handles other conversion tasks too, supporting FLAC to M4A and OGG to M4A conversions. It also works as one of the best video converters available for transferring various media formats across devices.
Option 2: VLC Media Player (Mac & Windows)
VLC Media Player supports audio format conversions but with a more complex process:
- Launch VLC and select Media > Convert/Save
- Click Add to browse for your WAV file
- Click Convert/Save
- Select the M4A profile or create a custom profile
- Set your destination file and click Start
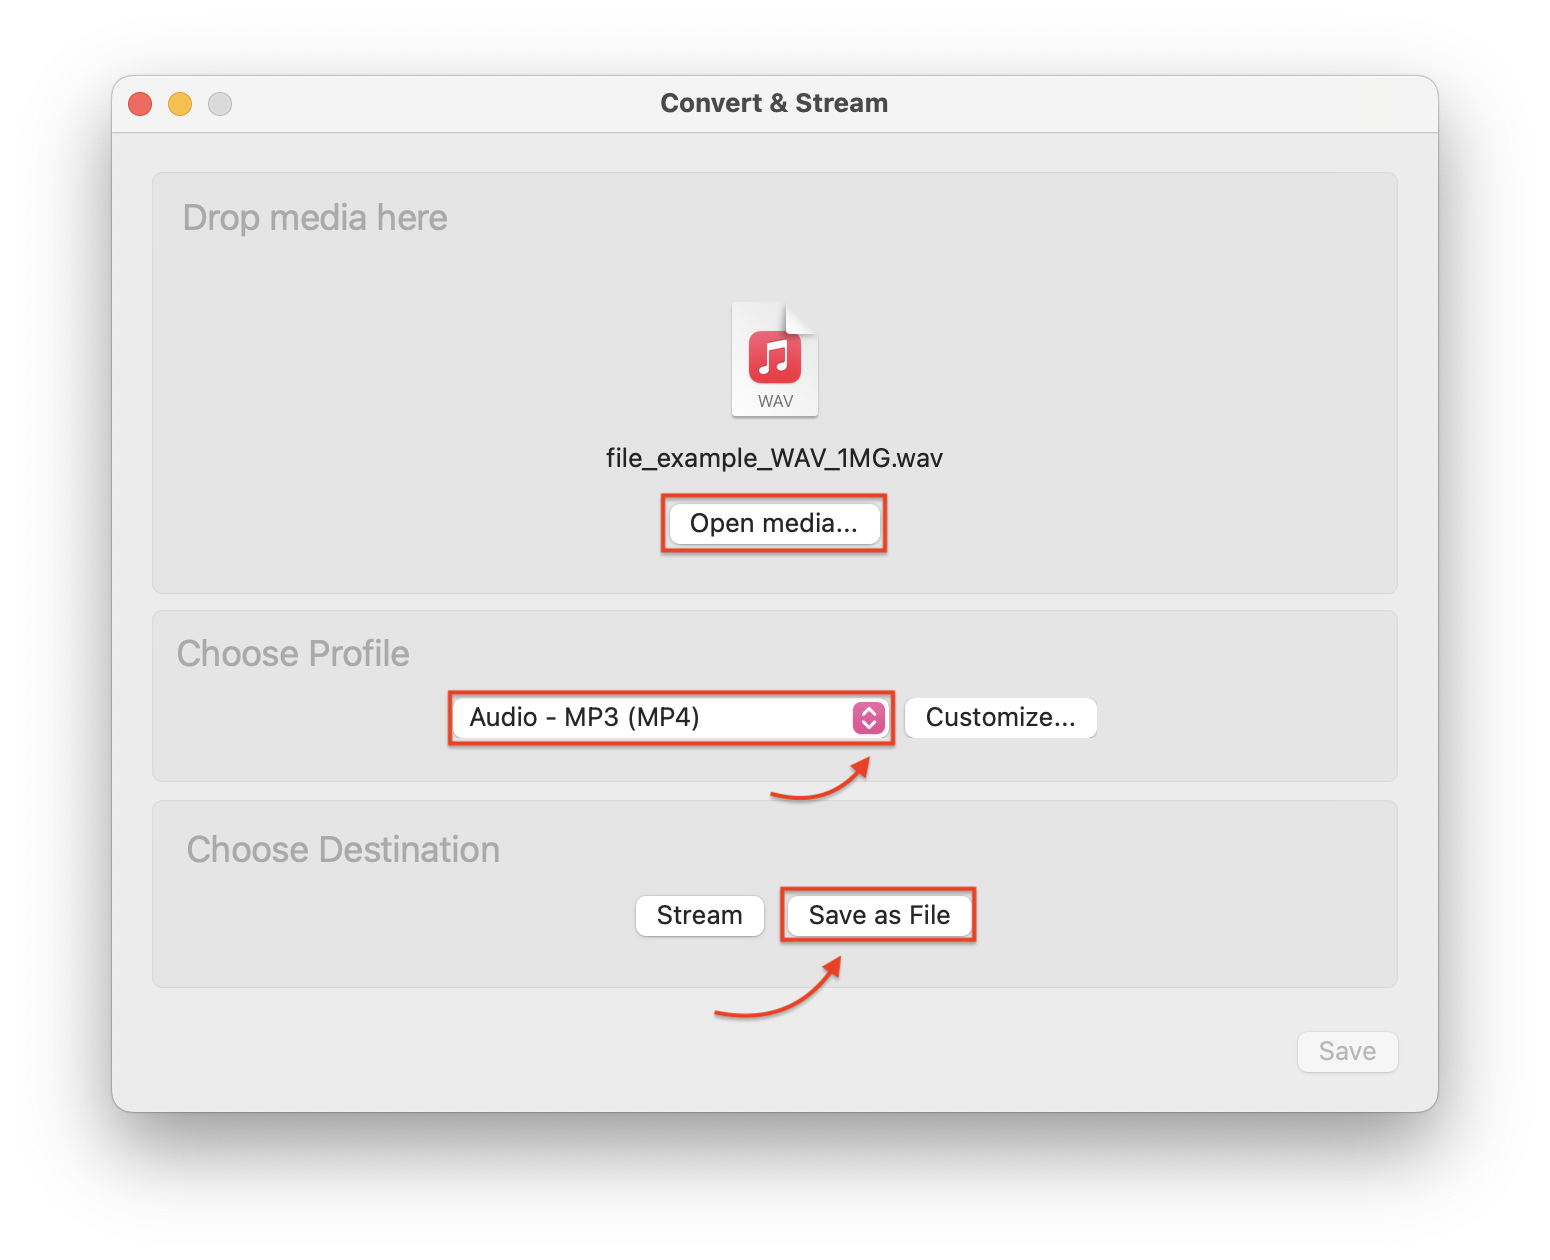
Creating a Custom Profile in VLC:
- In the Convert dialog, click the wrench icon next to Profile selection
- Name your profile (e.g., "WAV to M4A")
- On the Encapsulation tab, select "MP4/MOV"
- Switch to the Audio codec tab and check the "Audio" box
- Select "AAC" as the codec
- Set your desired bitrate (192 kbps offers a good quality/size balance)
- Adjust sample rate (44100 Hz recommended) and channels (Stereo)
- Click "Create" to save your profile
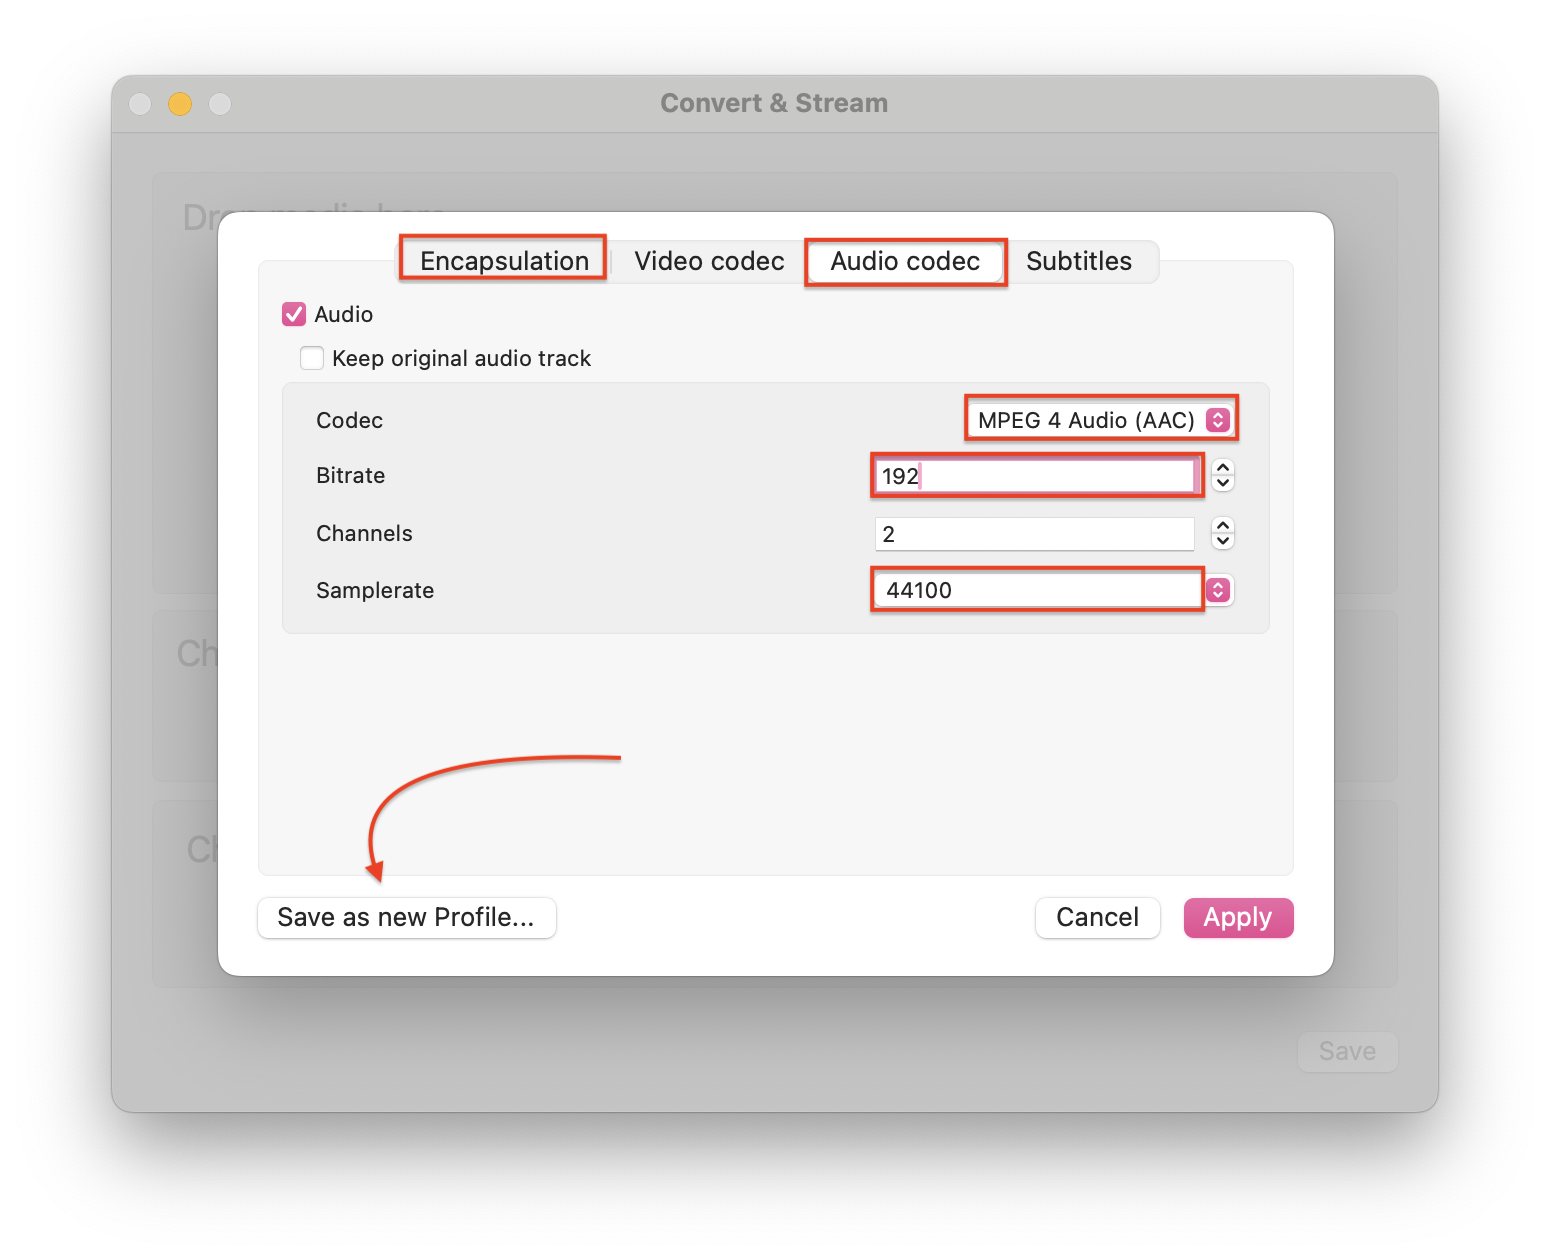
VLC is ideal for occasional conversions when you don't need to process many files. Power users can also use VLC's command line interface for batch processing:
While free, VLC conversions can sometimes result in audio glitches or slower processing times, especially with batch conversions of large files.
Option 3: iTunes (Windows Only)
For Windows users, iTunes provides another option:
- Open iTunes and go to Edit > Preferences > General > Import Settings
- Under Import Using, select Apple Lossless Encoder or your desired format
- Click OK
- Select your WAV file in iTunes
- Go to File > Convert > Create Apple Lossless Version
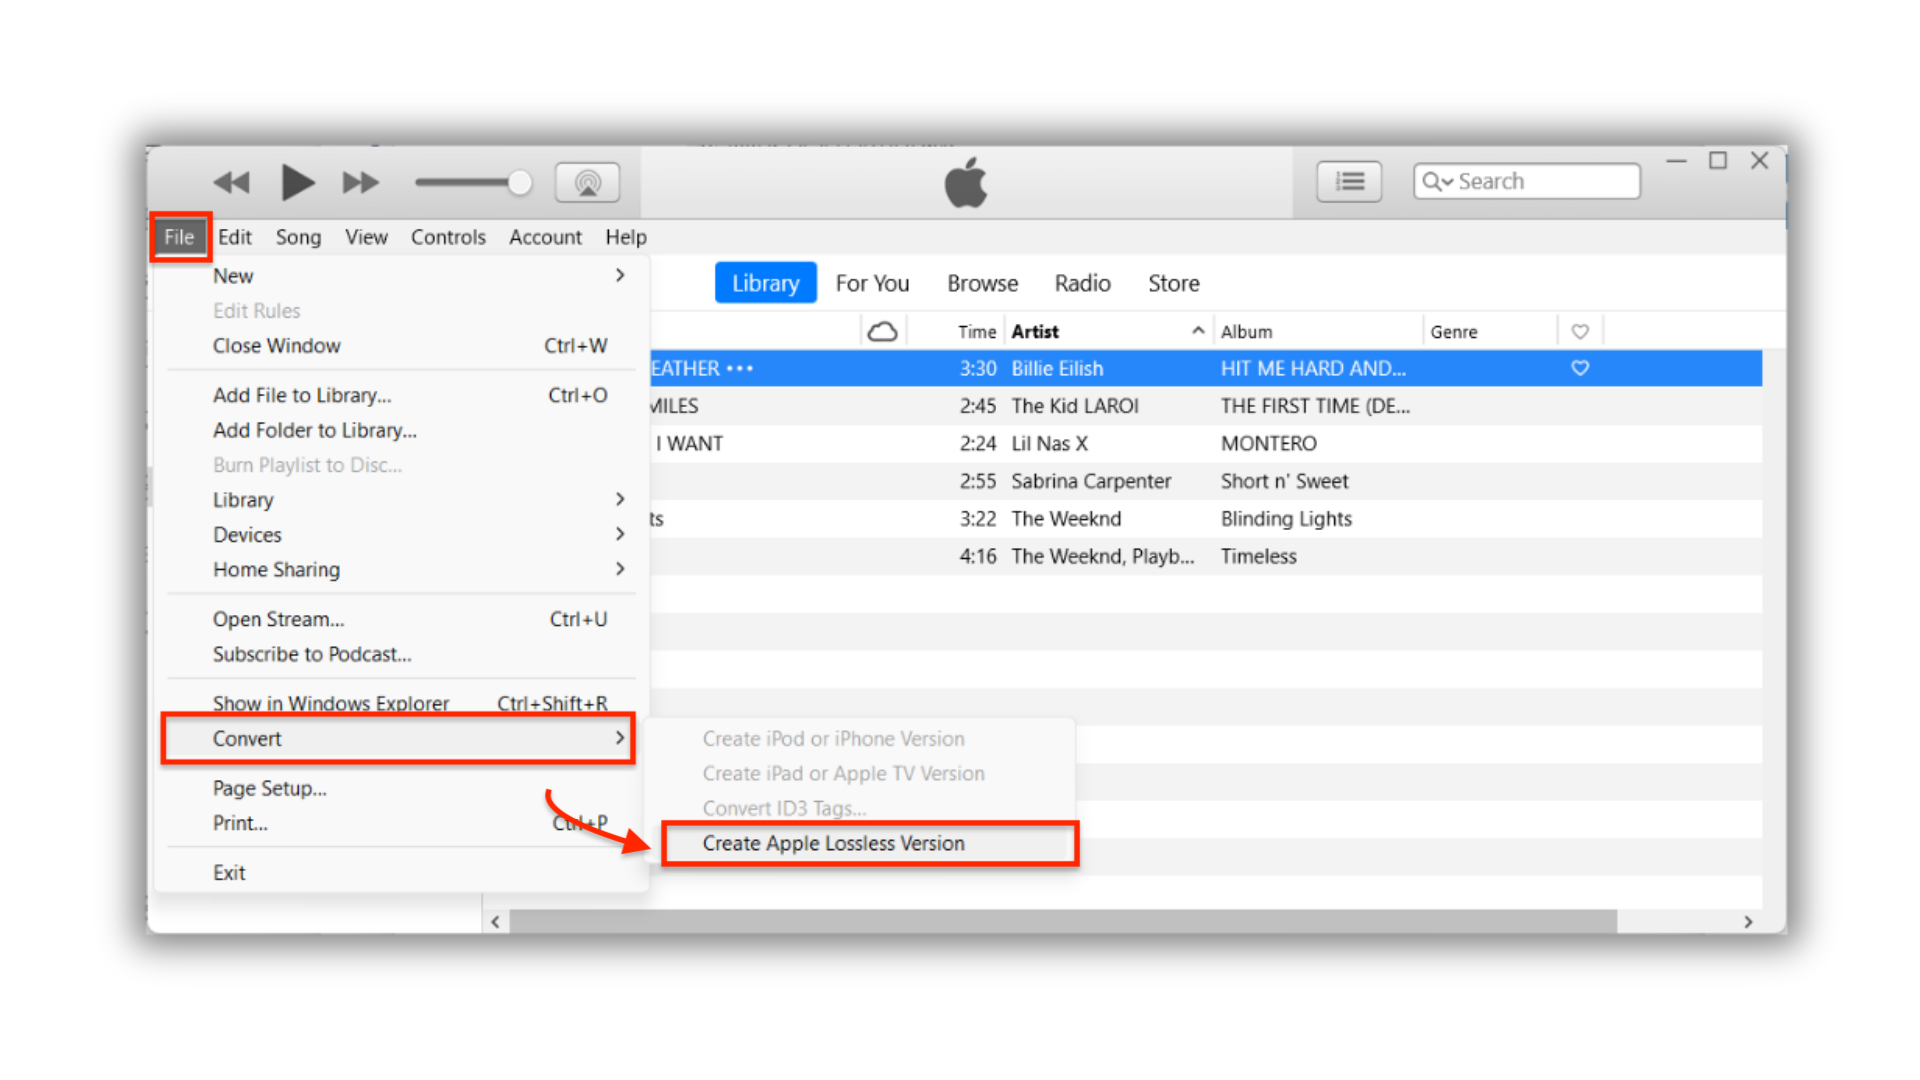
Important: iTunes has been discontinued for Mac users, making this option Windows-exclusive. Apple split iTunes functionality into separate Music, TV, and Podcasts apps for Mac users with macOS Catalina and later, focusing on a more streamlined experience for each media type.
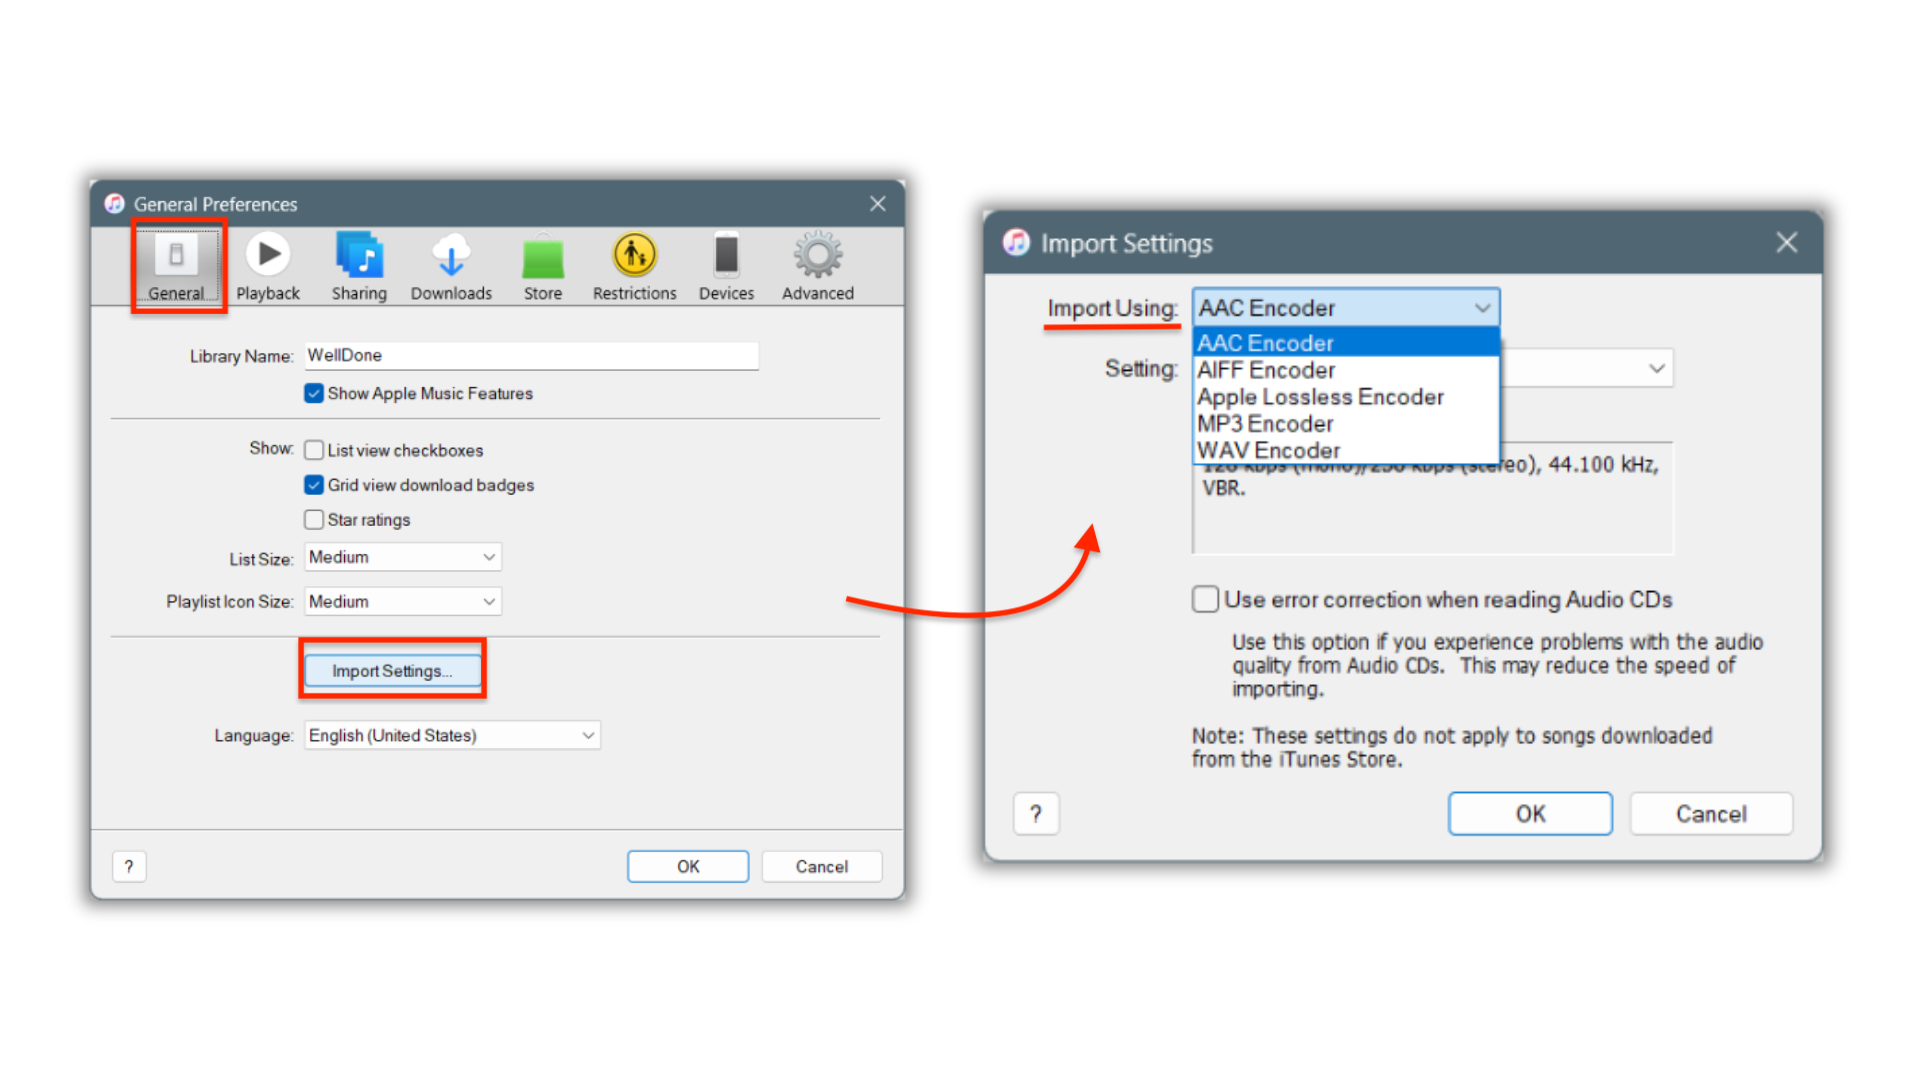
If you don't already have iTunes for Windows, you can still download it from Apple's website (https://www.apple.com/itunes/). The Windows version continues to receive updates and support despite being discontinued on Mac.
Online Tools for Quick Conversion
For one-off conversions without installing software, online conversion tools offer a convenient option:
- CloudConvert: Simple interface supporting many file formats
- Zamzar: Easy to use with email delivery option
- Online-Convert: Basic conversion with some customization options
- Convertio: Clean interface with cloud storage integration
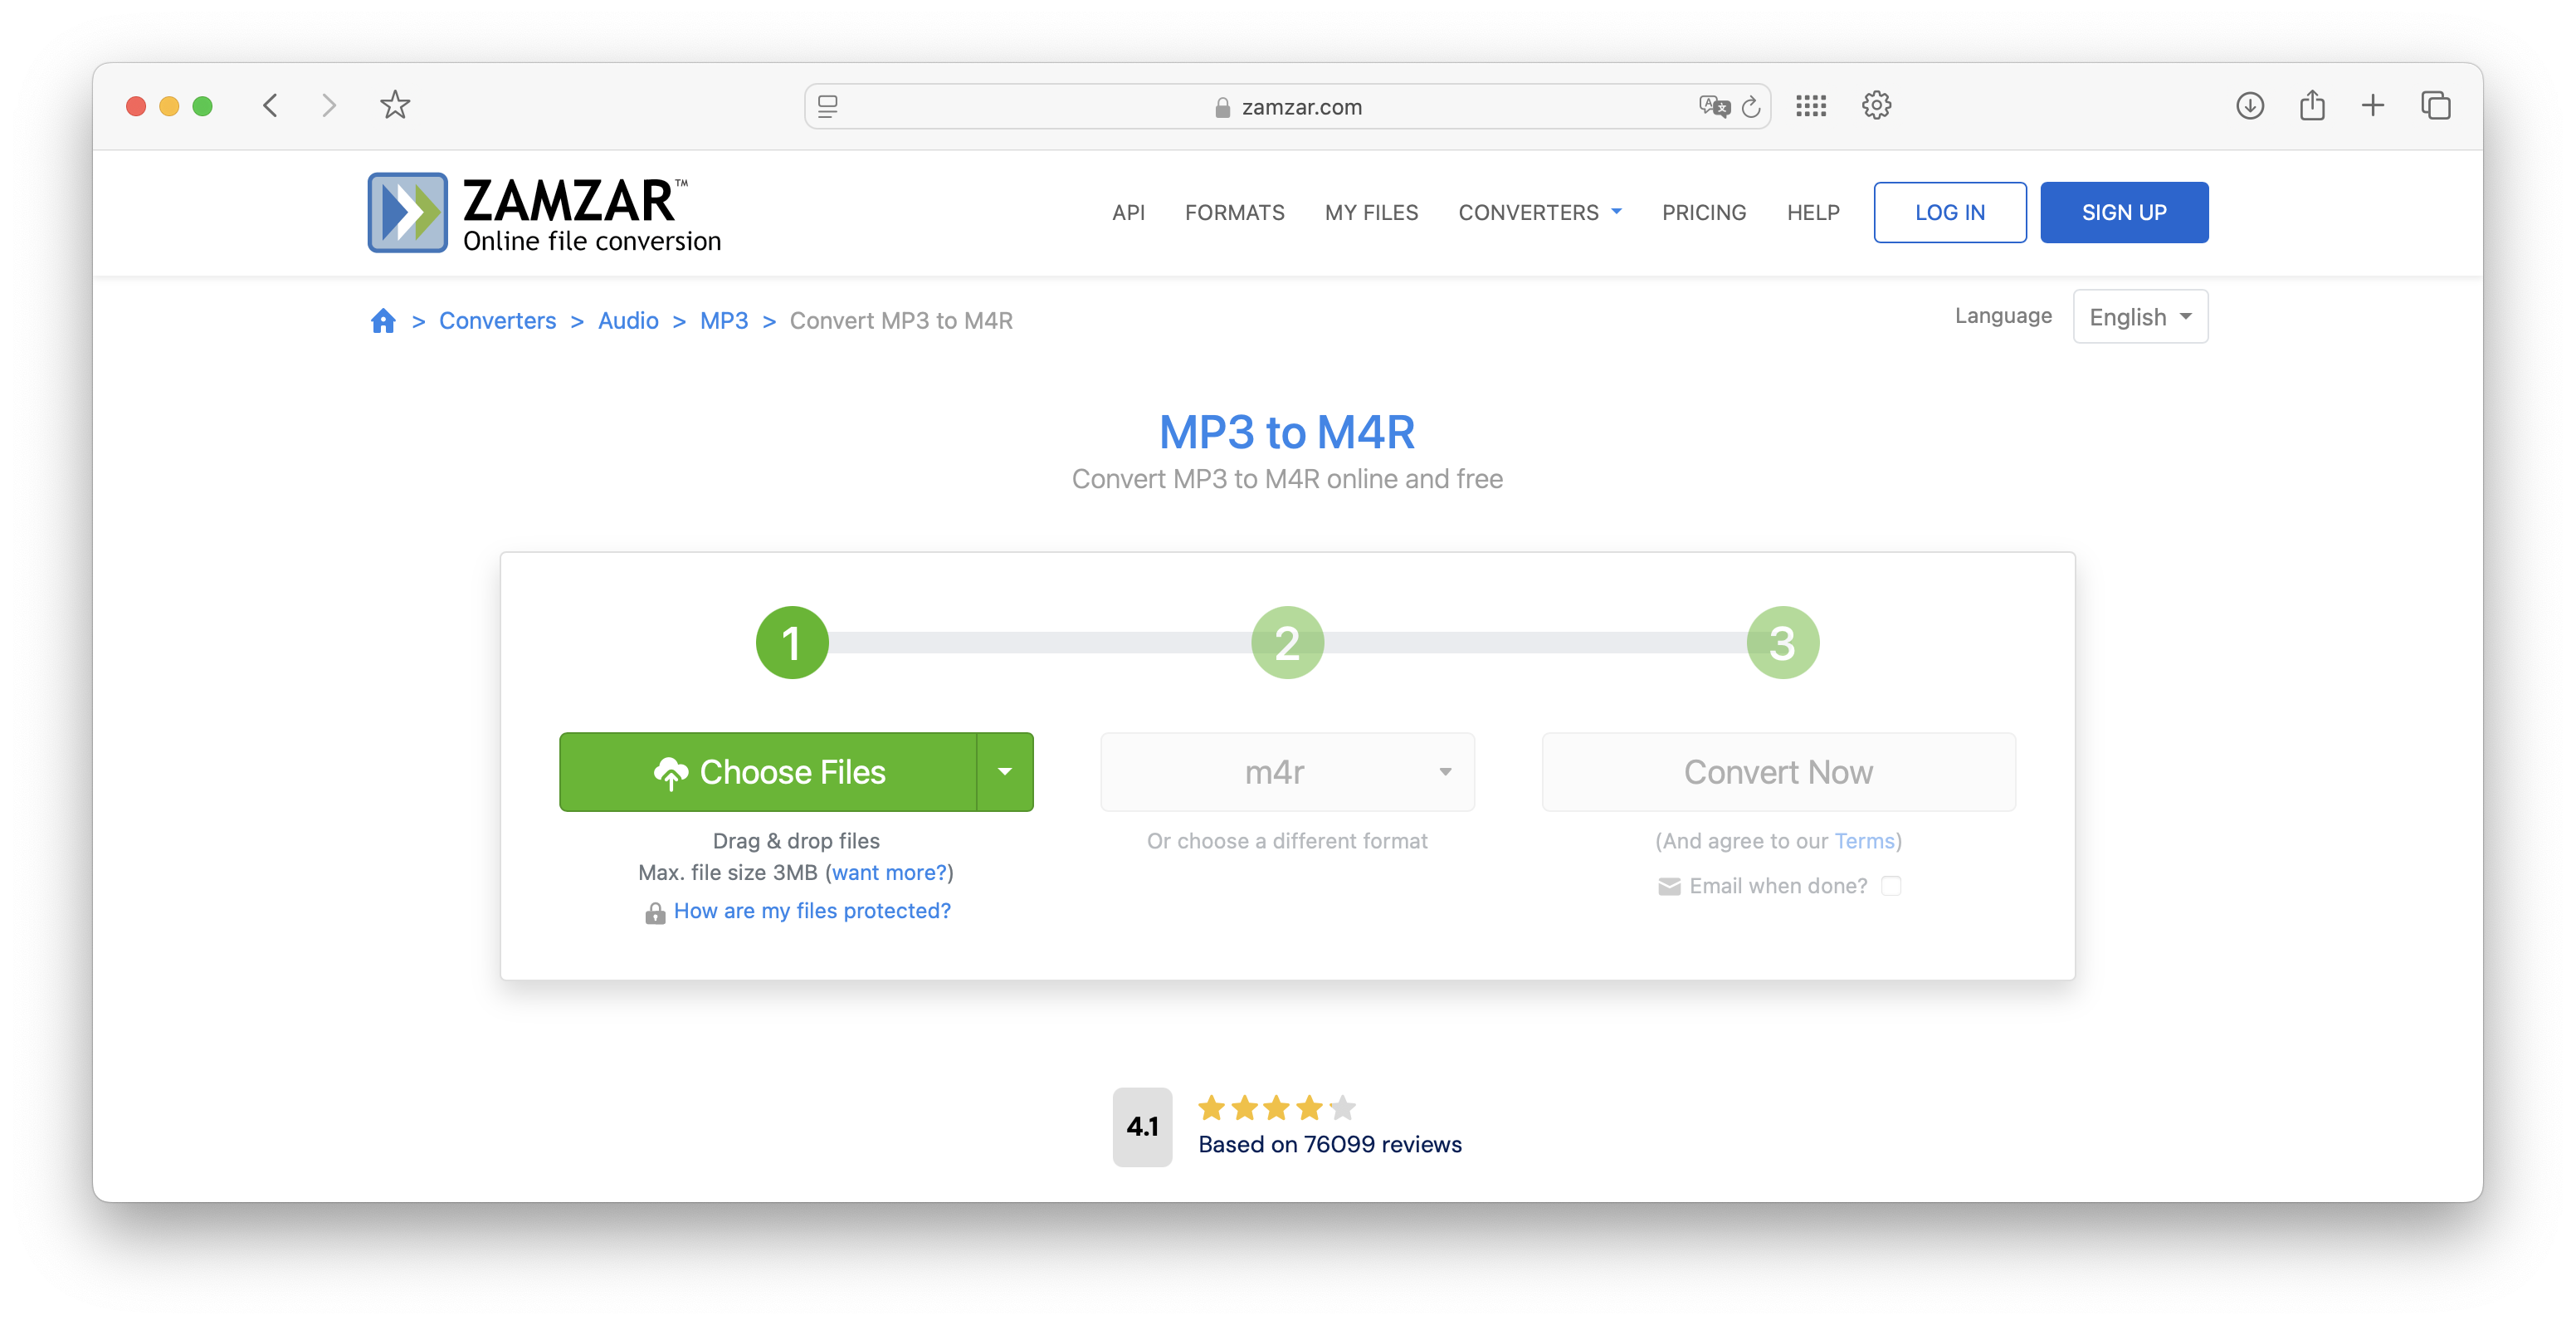
Online tools come with limitations and potential concerns:
- File size restrictions (typically 100-200MB)
- Privacy concerns with uploading personal audio
- Potential quality issues with some converters
- Limited batch processing capabilities
- Slower conversion speeds due to upload/download time
These tools work best for occasional, non-sensitive audio conversions when you need a quick solution without installing software.
Why WALTR PRO Stands Out
WALTR PRO offers several advantages over other conversion methods:
Simplicity: The drag-and-drop interface makes conversion accessible for all users
Speed: Conversions happen in seconds rather than minutes
Versatility: Handles not just WAV to M4A but multiple audio and video format conversions
Direct Transfer: Send converted files straight to iOS devices without iTunes
Reliability: Works without the glitches and errors common with free conversion tools
For Mac users especially, WALTR PRO fills the void left by iTunes' discontinuation, providing a straightforward way to manage media across Apple devices. WALTR PRO also excels at other media management tasks like transferring videos from PC to iPhone, adding subtitles to videos on iPhone, and setting ringtones without iTunes.
Final Thoughts
Converting WAV to M4A helps you save valuable storage space while maintaining excellent audio quality. While several options exist, WALTR PRO provides the most straightforward solution, especially for Apple device users.
Still unsure? Try WALTR PRO's free trial and experience the difference in speed and simplicity for yourself. Whether you're managing a large music library or just need to convert a few audio files, having the right tool makes all the difference.
FAQ
How can I convert WAV files to M4A format?
You can convert WAV files to M4A format using various audio conversion tools. A convenient option is WALTR PRO, which allows you to convert and transfer audio files seamlessly to your devices in just a few clicks.
What are the benefits of converting WAV to M4A?
Converting WAV to M4A offers several advantages, including reduced file size and better compatibility with most devices and music players. M4A files also maintain high audio quality while saving space, making them ideal for mobile use.
Is there a free way to convert WAV to M4A?
While there are free tools available for converting WAV to M4A, using WALTR PRO provides a streamlined experience with added features. The app ensures high-quality conversions and easy file transfers without the hassle of multiple steps.
Can I convert multiple WAV files to M4A at once?
Yes, WALTR PRO supports batch processing, allowing you to convert multiple WAV files to M4A simultaneously. This feature saves time and simplifies the conversion process, especially for larger audio libraries.
Will converting WAV to M4A affect audio quality?
The audio quality after converting from WAV to M4A largely depends on the converter used. WALTR PRO is designed to maintain high-quality audio during conversion, ensuring that your files sound great on any device.


